There are few things we need in our homes more than toilets, so when one goes down, it’s very aggravating. Here are three of the most common issues and how to fix them, and if it’s time for a new toilet installation for your Northbrook, IL home, call us at Bill’s Plumbing and Sewer.
Three Common Toilet Issues
Read the rest of this entry »When and Why to Replace Your Outdoor Hose Bib
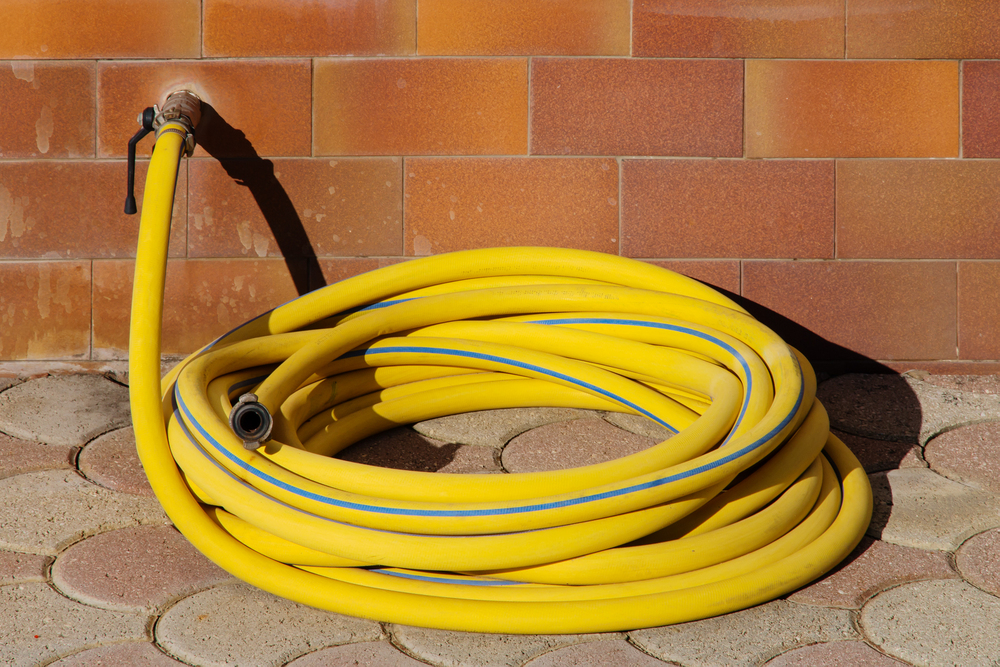
Outdoor hose bibs take a lot of wear and tear and exposure to weather here in Northbrook, IL. Knowing when to get a new hose bib installation done will save you a lot of headaches and money down the line.
When and Why Hose Bib Installation in Northbrook, IL Is Important
Read the rest of this entry »Top Plumbing Upgrades for Local Businesses
Plumbing might not be the first thing that comes to your mind when you think about running your business, but it’s essential to your daily operations, customer satisfaction, and thus your bottom line. Talk to your Northbrook, IL commercial plumbing services professional to find out what options will be best for your space and keep reading for some general upgrades that are often helpful for a business.
Top Plumbing Upgrades for Local Businesses
Read the rest of this entry »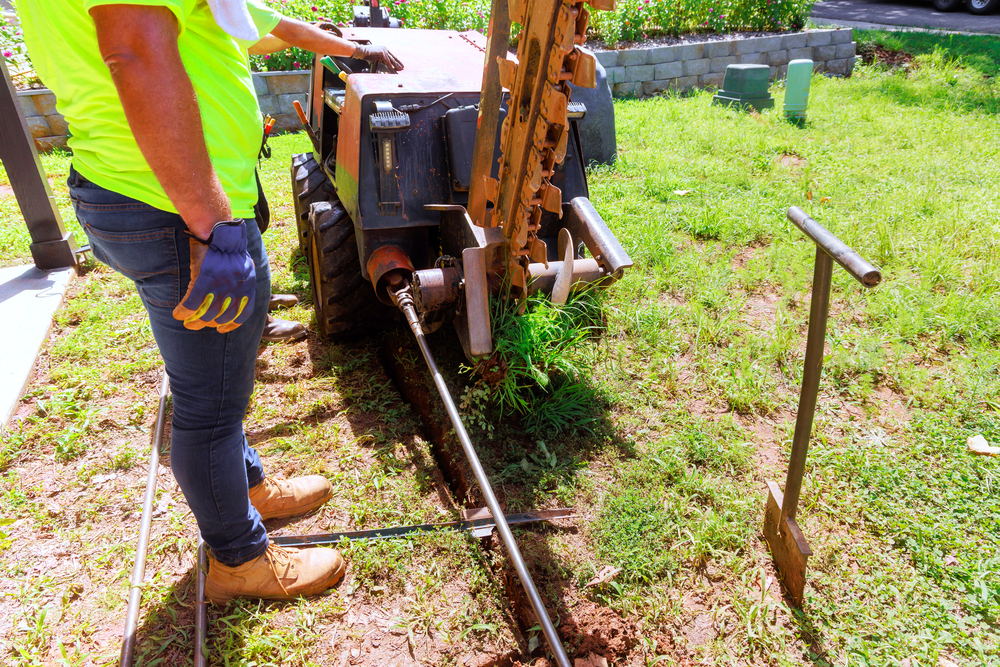
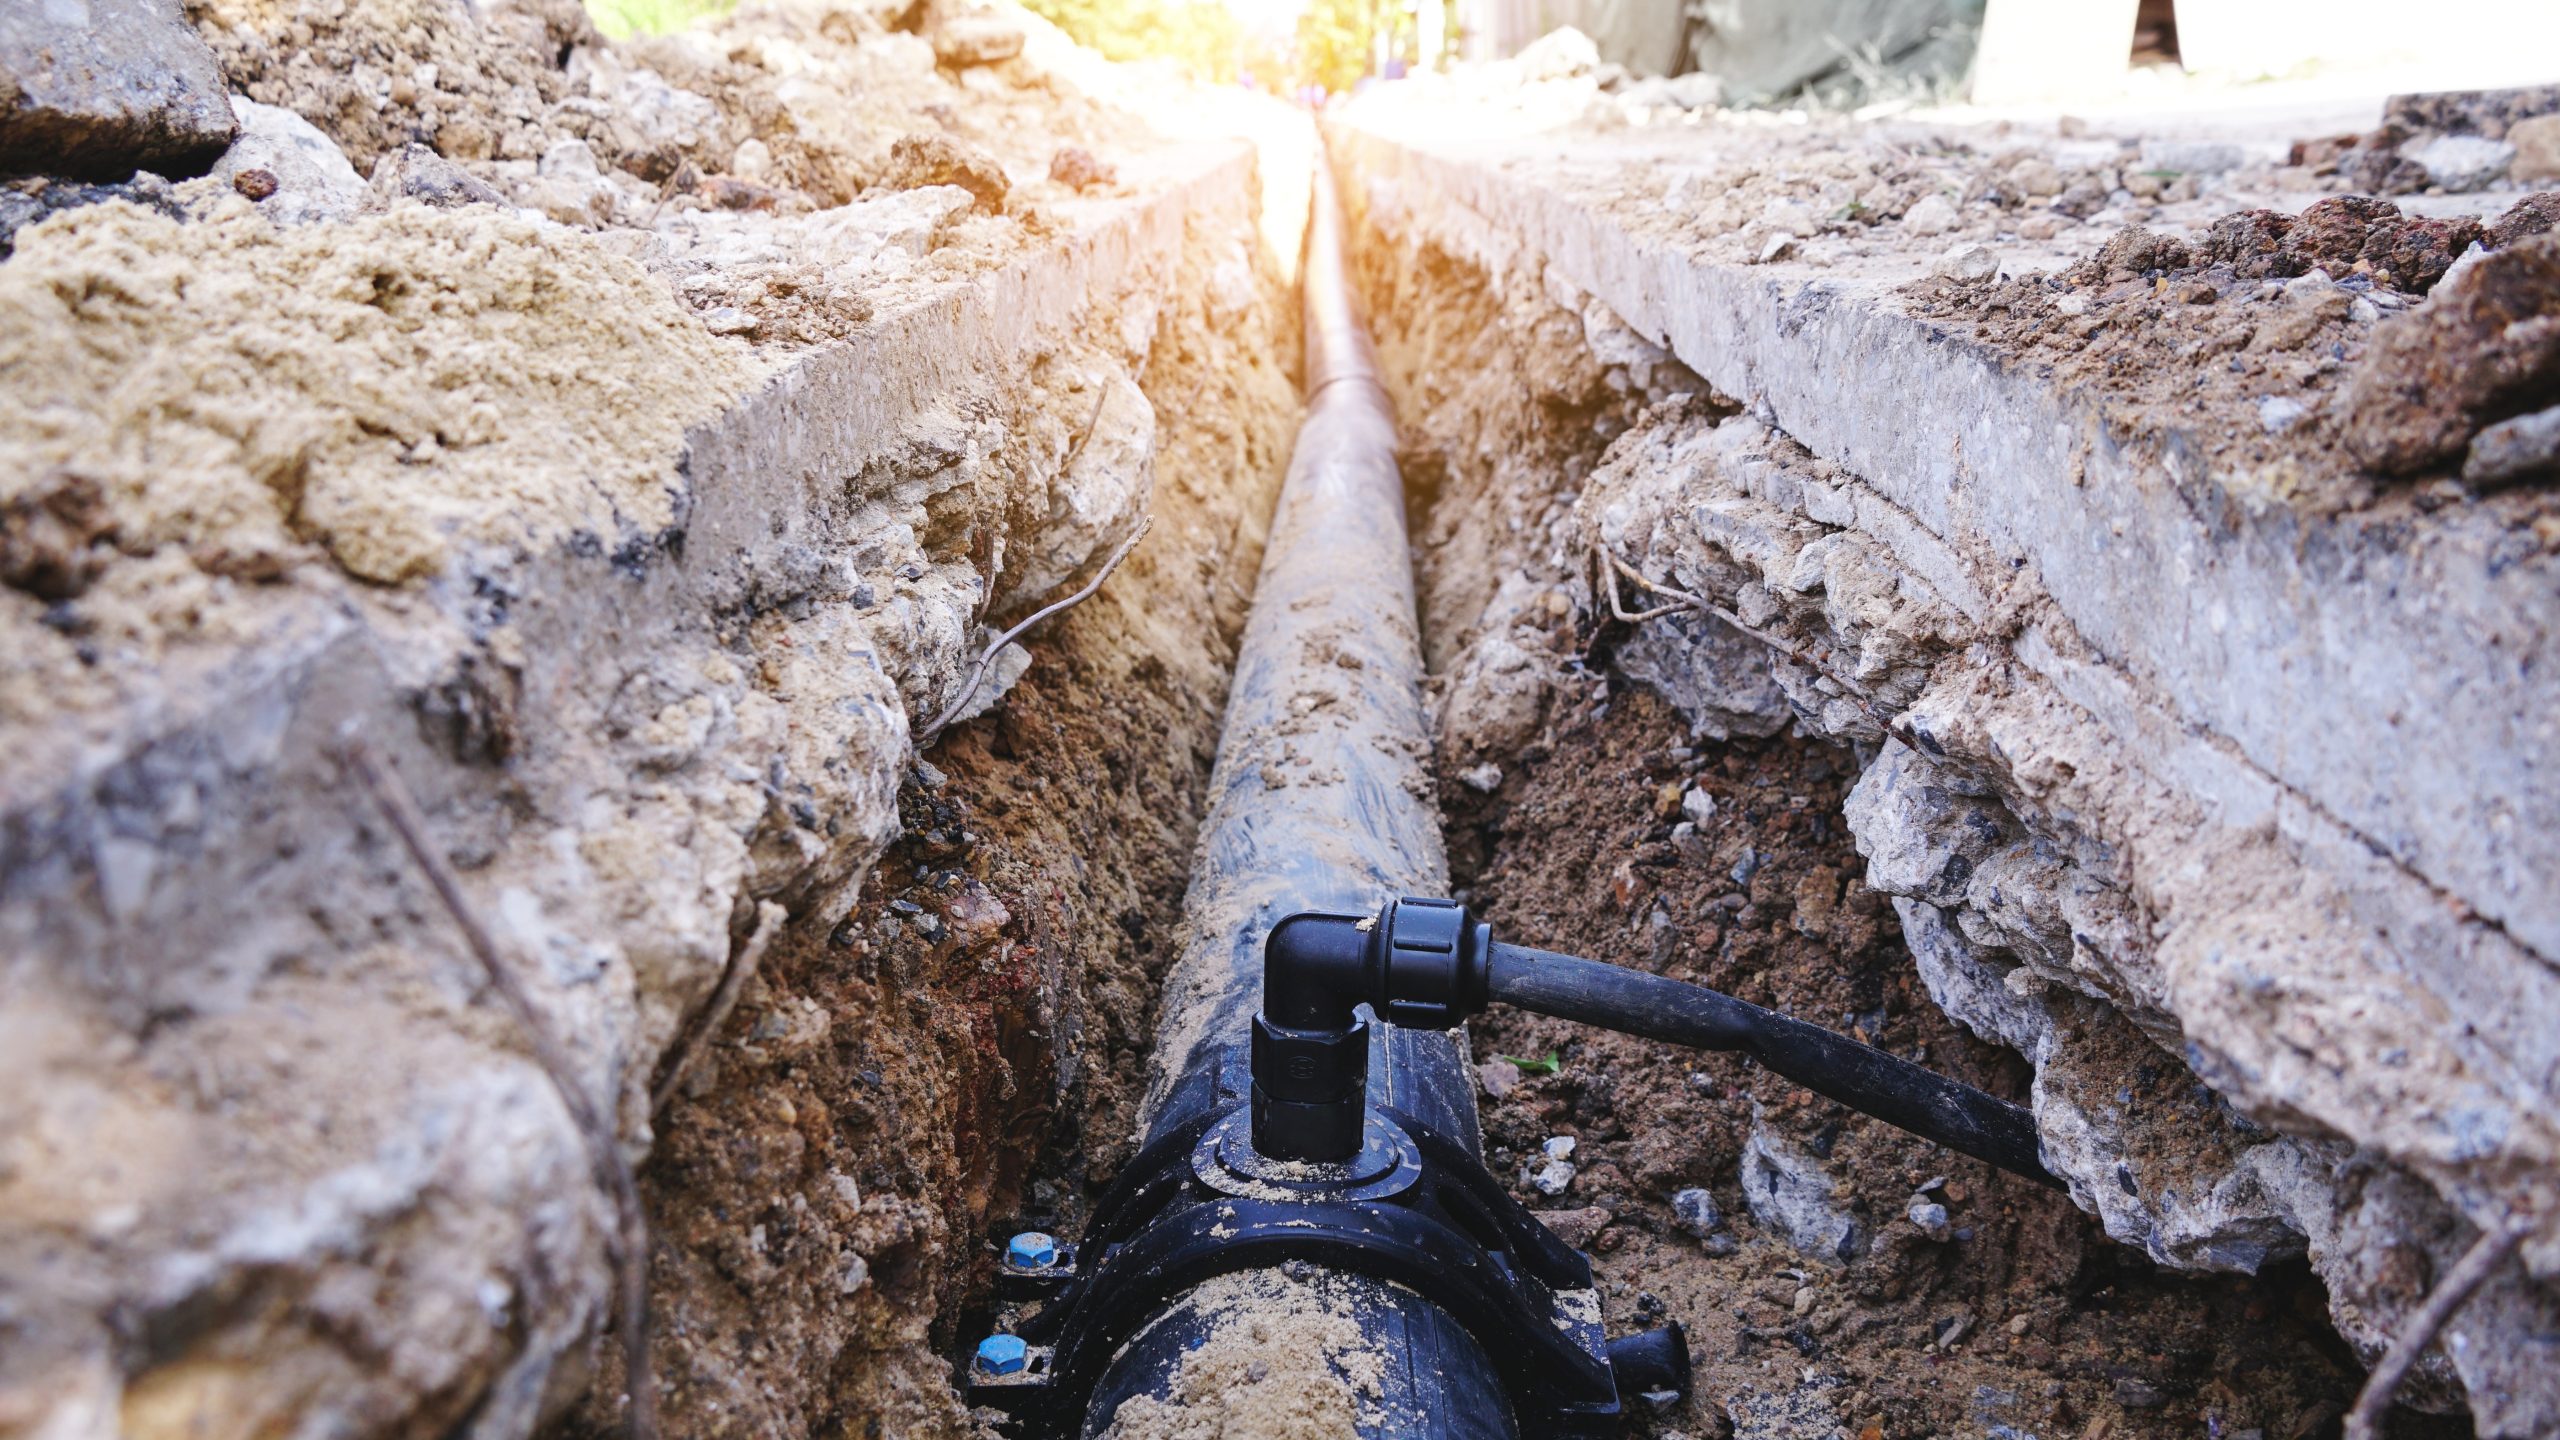
Northbrook homes are known for mature trees, established landscaping, and well-maintained yards. When a main water line or sewer pipe fails, many homeowners assume the repair will mean tearing up the lawn, driveway, or garden beds. Traditionally, that was true. Today, horizontal boring offers a way to replace underground pipes without destroying the property you’ve invested years maintaining.
Bill’s Plumbing and Sewer uses horizontal boring, also called trenchless boring or directional drilling, to complete major plumbing work while keeping surface disruption to a minimum.
How Horizontal Boring Works
Read the rest of this entry »
When a furnace stops working, panic usually follows—especially during a Northbrook winter. Many breakdowns come from a few predictable issues, and some basic checks can be done safely before calling for professional furnace repair. This guide walks you through simple troubleshooting steps and explains when it is time to contact Bill’s Plumbing & Sewer, your local expert for furnace repair near me in Northbrook, IL.
Whether the problem is a noisy system, poor airflow, or a furnace that will not start at all, this tutorial helps you understand what is happening and what you can do about it—up to the point where a trained furnace repair technician should step in.
Start with the Basics: Simple Furnace Troubleshooting
Most Valuable Items in a Water Damage Claim

When filing a water damage claim, it’s important to understand which items hold the most value. Properly identifying and documenting these items ensures fair compensation for your losses.
- Laptops and Phones: Expensive, especially for high-end models. Document the make, model, and condition.
- Major Appliances: Washing machines, refrigerators, and dryers are costly to replace. Keep purchase dates and feature details.
- High-Quality Furniture: Wooden furniture and upholstery can suffer severe water damage. Include receipts, appraisals, and photos.
- Rugs and Carpets: Expensive to replace, especially for rare or handwoven rugs. Document value and condition.
- Clothing: High-end or designer clothing can be damaged beyond repair. Include valuable items in your claim.
- Jewelry: Often the most valuable item in a claim. Keep receipts and appraisals for accuracy.
- Legal Documents: Important papers like contracts, tax records, and wills can be destroyed by water. Back them up if possible.
- Personal Effects: Sentimental items like family photos or artwork should be included in the claim.
- Walls and Flooring: Water can warp or destroy flooring and walls, which can be costly to repair. Document damage fully.
- Roof and Foundation: Leaks from roof or foundation issues often lead to expensive repairs. These should be addressed in your claim.
- Power Tools: Construction or home improvement tools can be expensive. Keep receipts and maintenance records.
- Other Equipment: Don’t forget about expensive machinery or hobby-related equipment that may be damaged.
How to Fill Out a Water Damage Claim
Accurate documentation is key when filing a water damage claim. Start by listing all damaged items with detailed descriptions, photos, and estimated repair or replacement costs. Specify the cause of the damage—whether it was a burst pipe, storm, or flooding—and include dates and any repair professional correspondence.
When submitting your claim, include all necessary supporting documentation. The insurance company may send an adjuster to inspect the damage. Make sure all documentation is organized and ready for review. Keep receipts or appraisals for valuable items.
Why Some Claims Are Denied
Incomplete Documentation
One of the most common reasons claims are denied is incomplete documentation. If you fail to provide detailed descriptions, photos, or proof of the damage, the insurance company may not have enough evidence to process your claim. Missing receipts, missing photos of damaged items, or inaccurate descriptions can lead to delays or denials. Always make sure you document everything thoroughly, including the condition of your property before and after the damage. This step is essential to ensure that you’re compensated fairly for your losses.
Non-Covered Damage
Water damage can occur from various sources, but not all of them are covered by every policy. For instance, if the damage is caused by flooding from an external source, your claim may be denied unless you have flood insurance, as many home insurance policies do not cover flooding. Similarly, if the water damage results from an unmaintained appliance or a plumbing issue that wasn’t properly addressed, the insurance company may deem it to be preventable, resulting in a claim denial. It’s crucial to fully understand the exclusions in your policy to avoid surprises and ensure that you’re only filing claims for covered damages.
Improper Repairs
If you make repairs before the insurance adjuster has assessed the damage, your claim may be voided. Insurance companies typically want to inspect the damage before any repairs are made to assess the extent of the loss. Making repairs without their approval can be seen as tampering with the scene, which could invalidate the claim. Always wait for an adjuster’s inspection before taking steps to fix the damage. Doing so ensures that you have proper documentation for your claim.
Policy Limitations
Even if you believe you are fully covered, certain types of damage or items may not be included in your policy. For example, some policies exclude damage from specific water sources, like sewer backups or floodwater from external sources. Additionally, items such as expensive jewelry or high-end electronics may have coverage limits, meaning you won’t be compensated for their full value unless specified in your policy. Always review your policy before filing a claim to ensure that you’re aware of any limitations, exclusions, or caps on coverage.
Still cleaning up after a flood? Schedule service online or call us today at 847-673-3045 to get you home back up and running.
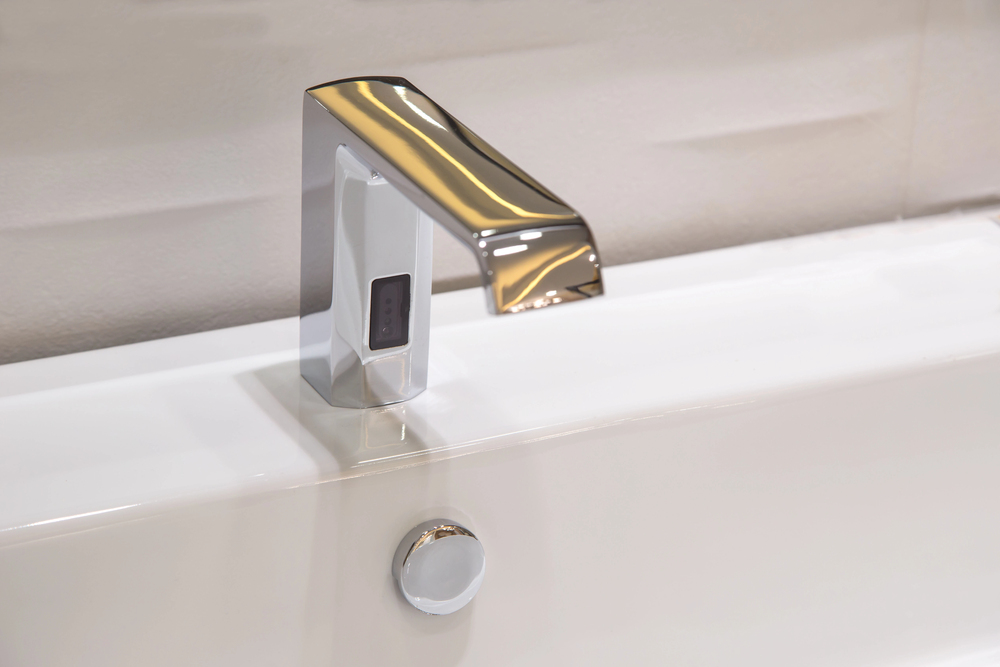
1. Leaky Faucets
A leaky faucet may seem like a minor inconvenience, but over time, it can add up to a significant waste of water and money. Leaks usually happen when washers or seals inside the faucet become worn out. These tiny parts can be replaced, but the real challenge is figuring out what’s causing the leak in the first place.
When you notice a constant drip from your faucet, it’s likely due to a worn-out washer or O-ring inside the faucet valve. The rubber or plastic washers wear down over time, allowing water to escape and create that annoying drip. Fortunately, fixing this issue isn’t too complicated. Start by turning off the water supply to the faucet and removing the handle to access the valve. Inspect the washers and O-rings; if they appear damaged, replacing them will often stop the leak. Once you’ve replaced the parts, reassemble the faucet, turn the water supply back on, and test for leaks. It’s a simple fix that can prevent unnecessary water waste and lower your utility bills.
2. Clogged Drains
Clogged drains are an all-too-familiar household problem. They can occur for many reasons, such as soap, grease, food particles, or hair building up in the pipes. Sometimes the clog can be resolved with a simple solution, while other times it requires a more detailed approach.
For small, localized clogs, you can start by using a plunger. This common tool works by using air pressure to dislodge blockages in the pipe. If that doesn’t work, you can try a drain snake, which is a coiled metal wire that you insert into the drain to physically break up or pull out the clog. Alternatively, a mixture of baking soda and vinegar followed by hot water can break down minor blockages and clean the pipes. If the drain remains clogged, it could be an indication that there is a more serious buildup farther down the pipe, requiring a professional-grade auger or snaking tool to clear it out.
Preventing clogs in the first place is key. Consider using drain covers to catch hair or food debris, and avoid pouring grease down the drain, as it can solidify and cause further blockages. Regularly flushing your drains with hot water can also help keep things flowing smoothly.
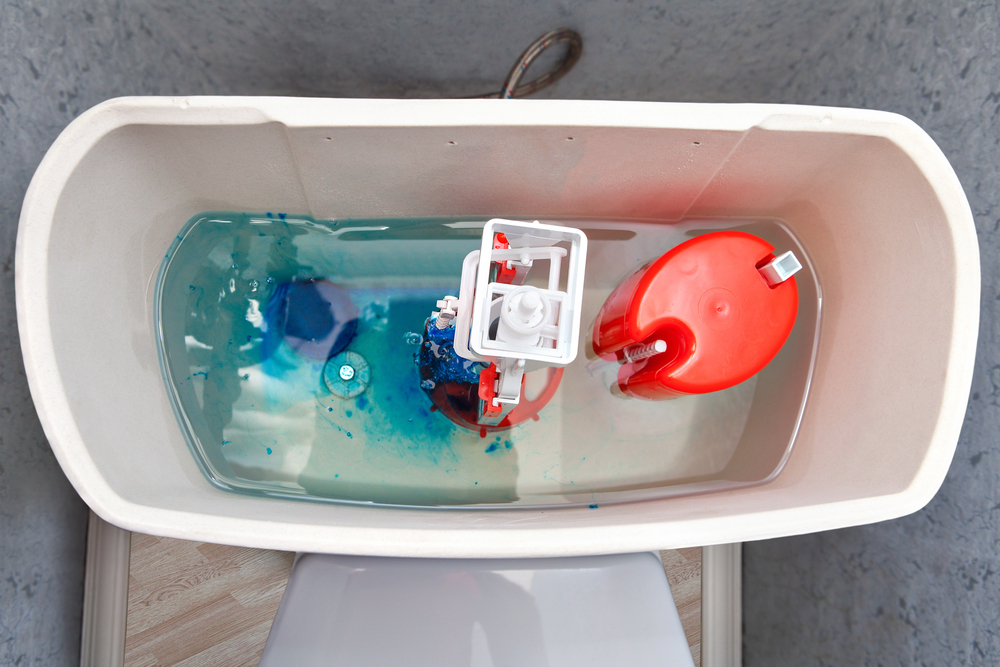
3. Running Toilet
A running toilet is one of the most frustrating plumbing problems because it wastes both water and money. When the toilet continues to run after being flushed, it’s typically caused by issues with the internal components of the toilet tank. The most common culprit is a faulty flapper valve, which controls the flow of water into the bowl. If the valve doesn’t seal properly, water will continuously leak into the bowl, leading to the running sound. Other potential causes include a misaligned float or a malfunctioning fill valve.
The first step in fixing a running toilet is to turn off the water supply to the toilet. After that, remove the tank lid and inspect the flapper, float, and fill valve. If the flapper valve appears worn or warped, it can be replaced easily. Adjust the float if it seems too high or low, which affects the water level in the tank. If the fill valve is malfunctioning, it might need a replacement. These parts are generally affordable and can be found at most hardware stores. Once everything is in place, turn the water back on and check for leaks or the continued running of water.
4. Low Water Pressure
Low water pressure is another common issue that homeowners face. A sudden drop in water pressure can make showering, washing dishes, or doing laundry a tedious task. The cause could be something as simple as a clogged aerator on the faucet, or it could indicate a more serious issue such as a leak in your plumbing or a problem with the water supply.
If only one faucet is affected, the problem is likely with the aerator. The aerator is a small screen at the end of the faucet that controls the flow of water. Over time, mineral deposits can build up, restricting water flow. Unscrewing the aerator and cleaning it with vinegar usually solves the problem. However, if the low pressure is widespread, it could be due to pipe corrosion, leaks, or issues with the water supply line. You may need to call in a professional plumber to diagnose and fix the issue if it’s not isolated to a single fixture.
In the meantime, you can increase the pressure temporarily by adjusting the pressure regulator, which controls the water pressure for the entire system. If the regulator is faulty, replacing it can restore normal water pressure.
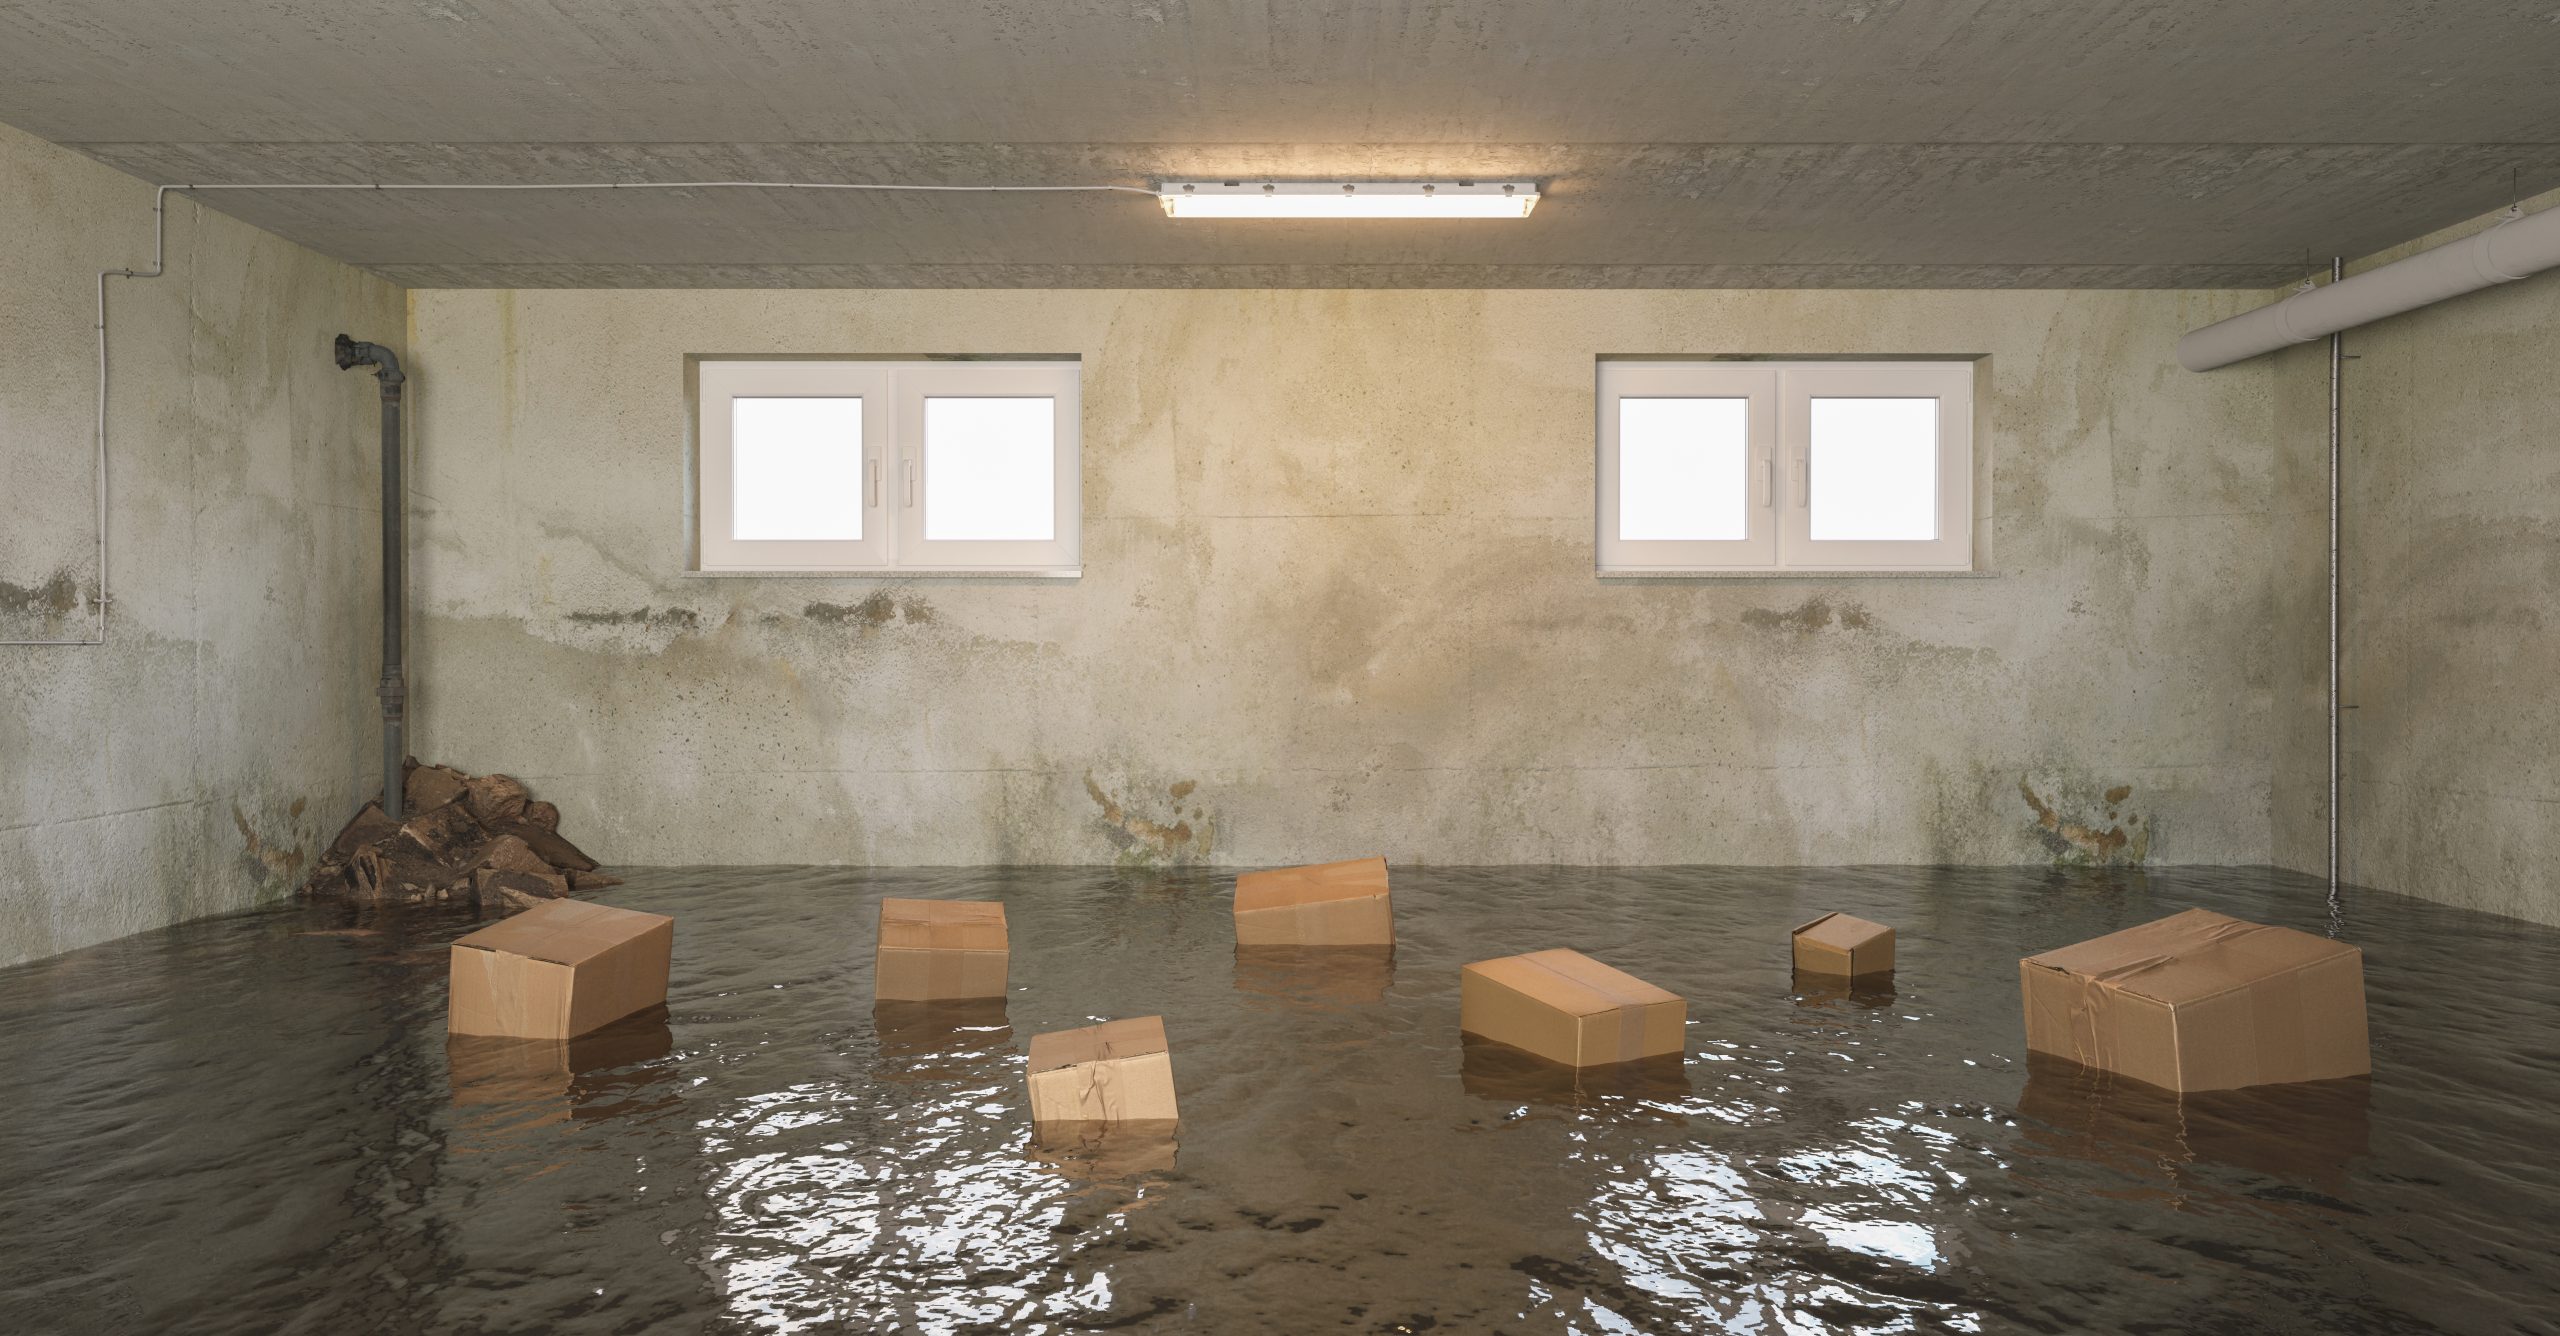
5. Burst Pipes
Burst pipes are one of the most serious plumbing issues that can lead to extensive water damage in your home. This problem is especially common in colder climates, where pipes freeze and crack during winter. Other factors such as age, poor maintenance, or tree roots growing into the pipes can also cause pipes to burst.
If you discover a burst pipe, it’s crucial to act quickly. First, turn off the main water supply to prevent further flooding. If the pipe is frozen, carefully thaw it out using a hairdryer or space heater (never use an open flame). Once the pipe is thawed, inspect it for cracks or breaks. For small cracks, you can temporarily seal the pipe with pipe repair tape, but a burst pipe may require replacing a section of the pipe entirely. In some cases, a professional plumber will need to fix the issue if the damage is too severe.
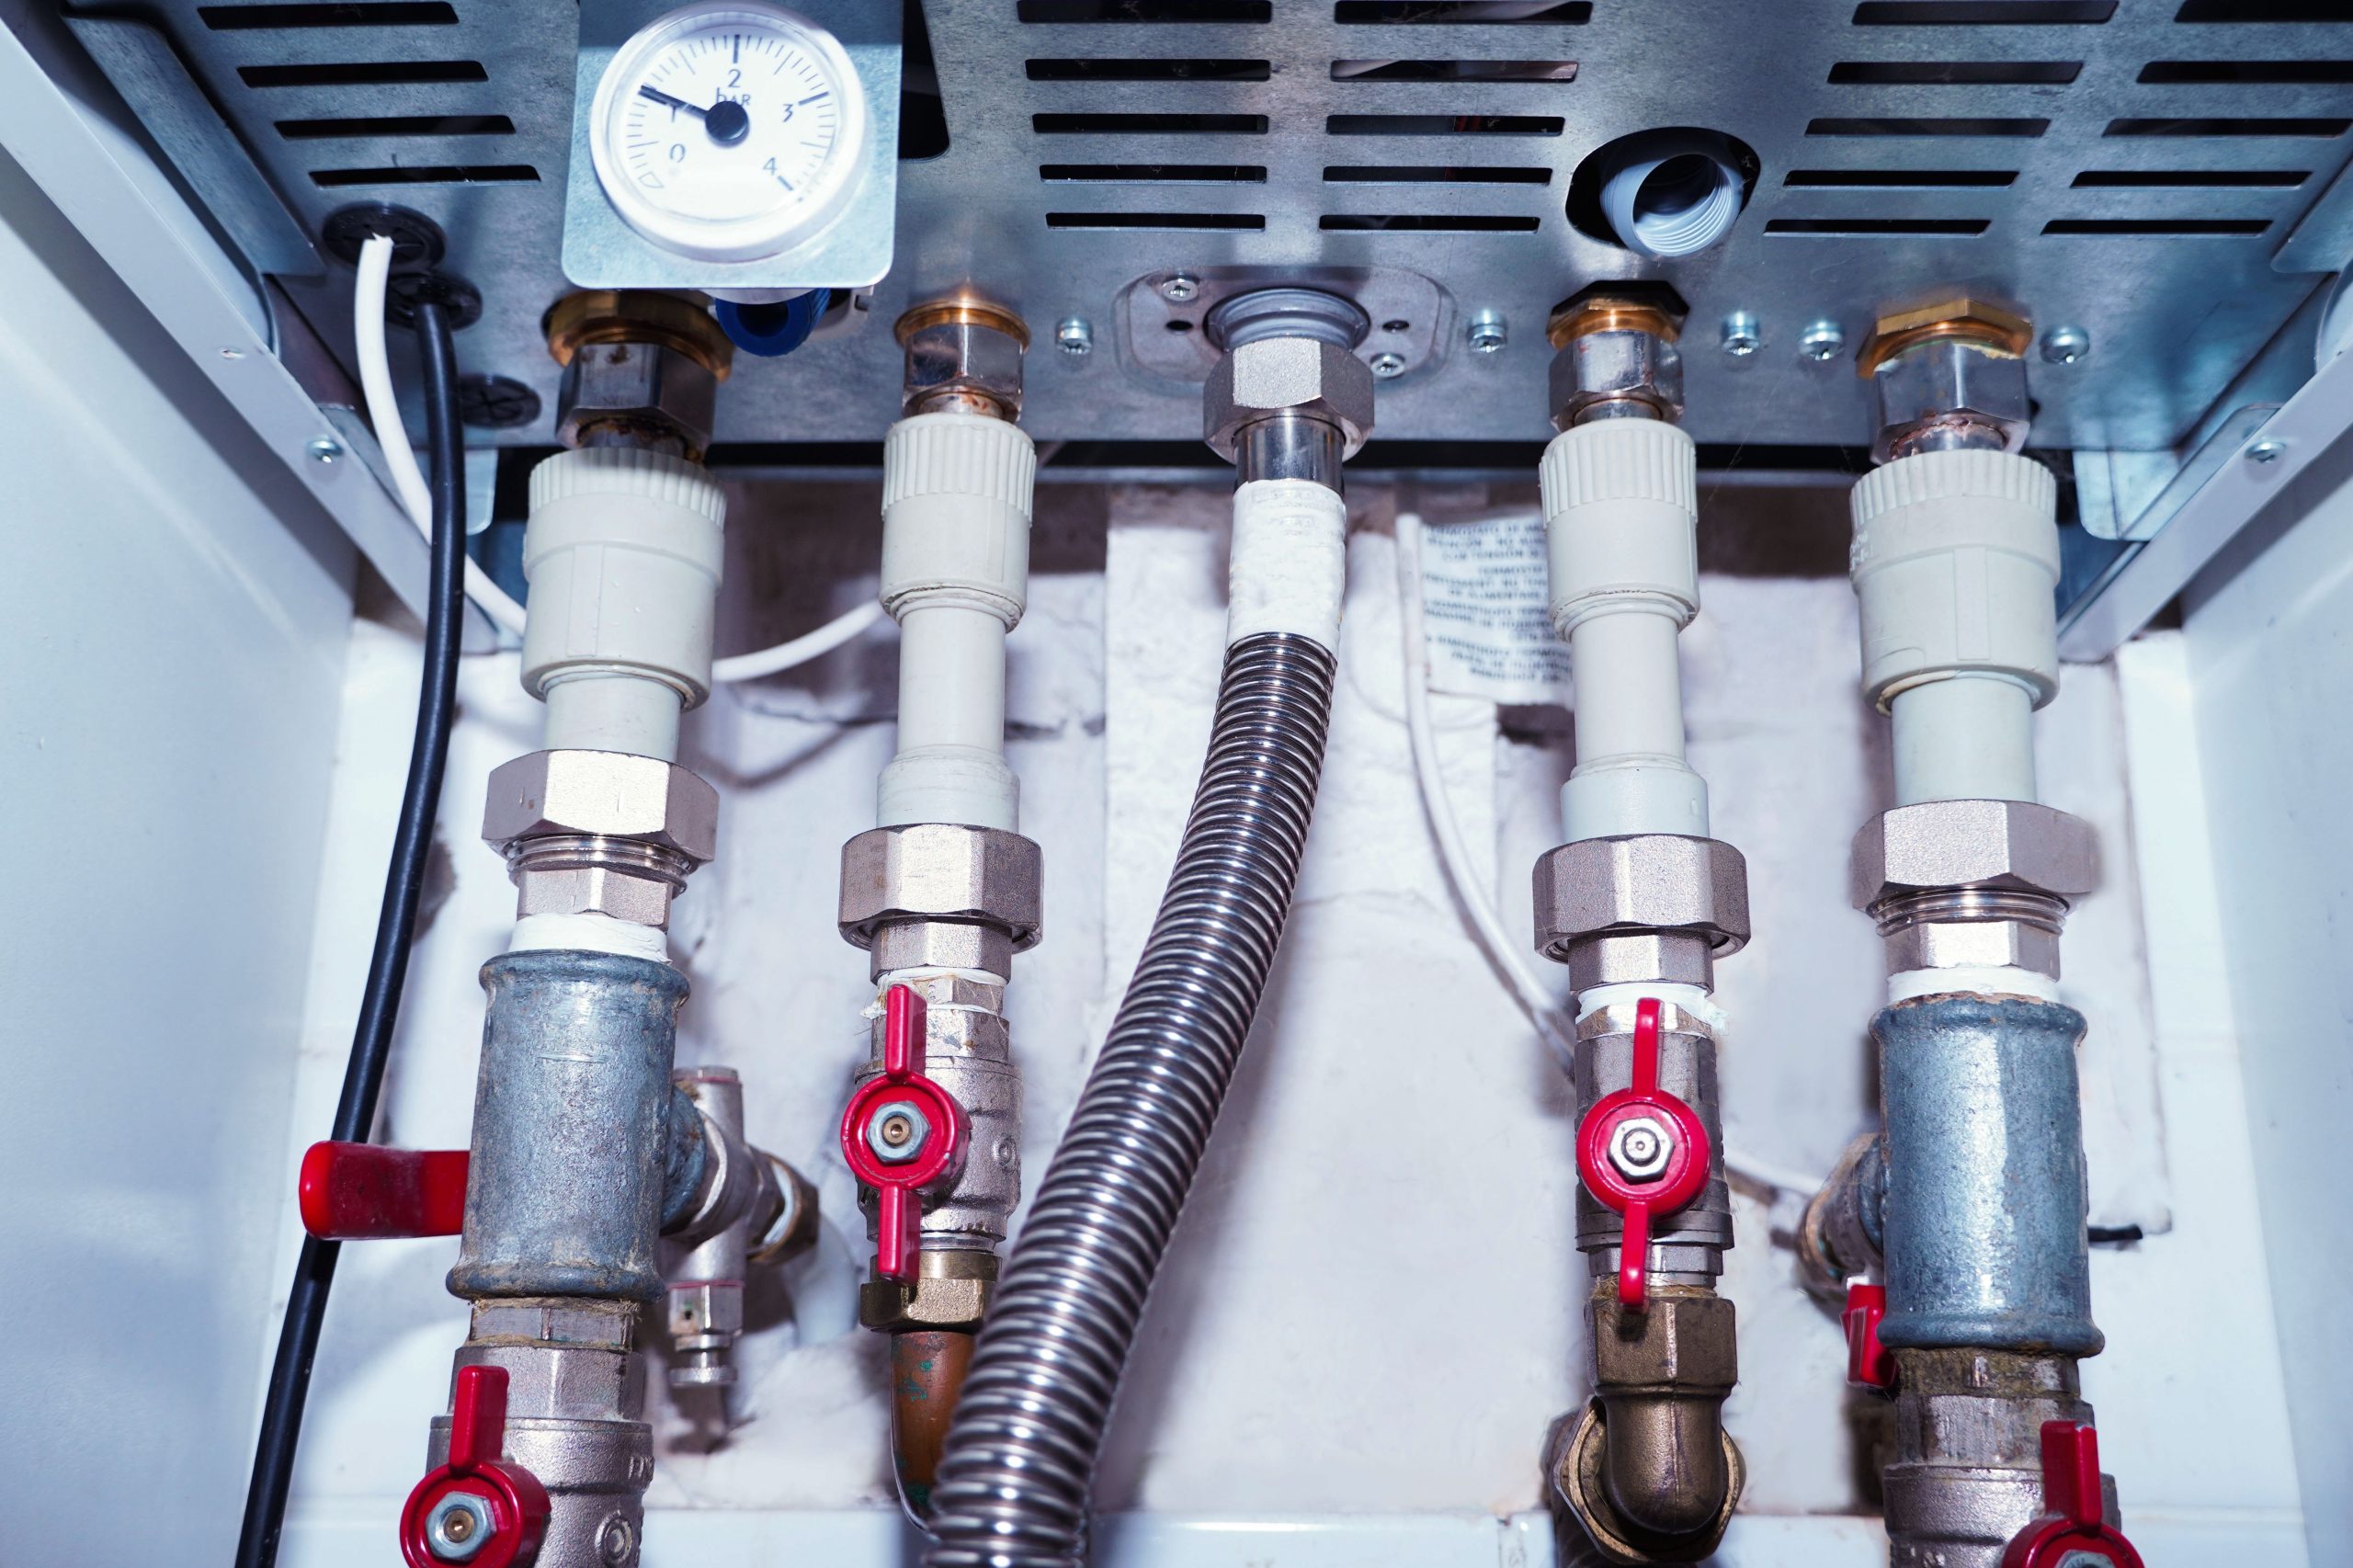
6. Water Heater Issues
Water heater problems are something most homeowners will face at some point, whether it’s not producing hot water, making strange noises, or leaking. Common causes include sediment buildup in the tank, a broken heating element, or a malfunctioning thermostat.
If you notice that your water heater isn’t providing enough hot water, the first step is to check the thermostat. Ensure that it’s set to the correct temperature, around 120°F, as higher settings can cause overheating or energy waste. Sediment buildup at the bottom of the tank is a frequent cause of water heater malfunctions. To address this, turn off the water and power supply, and then drain the tank to remove sediment. If the water heater is making popping or crackling noises, it’s often a sign of mineral buildup, and draining the tank will likely solve the problem.
In more severe cases, the heating elements may need to be replaced, or you may need to install a new water heater if yours is too old or damaged to be repaired.
7. Sewer Line Problems
If your toilet and/or drains are backing up with sewage, there’s a major obstruction somewhere in the main sewer line. Tree roots, grease buildup, and pipe collapse are the usual culprits.
If you suspect a sewer line blockage, avoid using sinks or toilets to prevent any further waste from backing up. While minor blockages can sometimes be cleared using a plumbing snake or auger, most sewer line problems require professional intervention. A plumber can inspect the line with a camera to locate the blockage and either clear it or replace the damaged pipe. In some cases, tree roots may need to be removed, or the entire sewer line might require replacement to restore proper flow.
Mold vs. Mildew: What’s the Difference?

Mold and mildew are both types of fungi that thrive in moist environments, but they differ significantly in terms of appearance, impact, and the approach needed for removal. While they start as spores and share similar growth conditions, understanding the differences is essential for managing and preventing these common household issues. Despite these similarities, there are clear distinctions between mold and mildew that will affect how they are handled in your home.
Key Differences in Appearance
The visual differences between mold and mildew are noticeable. Mildew usually appears as a flat, powdery growth, typically in white or gray shades, though it can turn yellowish or brown over time. It tends to grow on the surface of materials, making it easier to spot. Mold, on the other hand, appears as fuzzy or slimy patches with irregular shapes and can range in color from green and blue to black or white. Mold often penetrates deeper into the material it grows on, which makes it harder to remove and more destructive.
Mildew’s flat texture is not only easier to spot but also simpler to clean. Mold, however, is more invasive and can cause lasting damage to surfaces like wood, drywall, and carpets. As mold spreads, it can eat through these materials, leading to structural issues that are costly to repair.
Health Impacts and Odor Differences
Mold and mildew both release spores into the air, which can lead to respiratory issues, allergies, and other health concerns. However, the severity of their effects differs. Mildew tends to cause less harm in comparison but still poses a health risk. People exposed to mildew spores may experience coughing, headaches, or trouble breathing, particularly in people with asthma or allergies.
Mold, especially black mold, can be much more dangerous. It can produce mycotoxins that enter the body through inhalation or skin contact, leading to serious health problems. Prolonged exposure to mold may cause neurological issues, memory loss, and in some cases, more severe respiratory issues. Additionally, mold tends to have a strong, musty odor that can be overwhelming, whereas mildew has a softer, wet smell.
Removal Techniques: Mildew vs. Mold
The method of removal for mold and mildew varies greatly due to their differences in severity. Mildew can often be cleaned with household cleaning products like bleach, vinegar, or hydrogen peroxide, along with a scrubbing brush. It’s generally more manageable and won’t require extensive equipment or professional help.
Mold removal, however, is more complicated and can require professional services, especially if the mold is widespread or invasive. In some cases, mold can be removed using bleach, but specialized cleaners are often necessary to ensure that the spores are eradicated. Mold removal should be done with proper safety precautions, such as wearing masks, goggles, and gloves, to prevent exposure to harmful spores. For significant mold infestations, especially black mold, it’s best to call in a mold remediation specialist who has the proper tools and training to handle the situation safely.
Preventing Mold and Mildew Growth
The best way to deal with mold and mildew is to prevent them from forming in the first place. Both fungi thrive in environments with high humidity, so controlling moisture in your home is essential. Keeping your home dry and well-ventilated is the most effective strategy. Using dehumidifiers in areas prone to moisture, such as basements and bathrooms, can help maintain an optimal humidity level of 40-50%. Regularly inspect and maintain your HVAC system to ensure proper airflow, and check for any leaks that could allow moisture to accumulate.
Quickly addressing spills, leaks, or dampness can prevent both mold and mildew from establishing a foothold in your home. For mildew, ensure that any affected plants, fabrics, or surfaces are cleaned and dried promptly. For mold, it’s important to monitor areas like insulation or drywall where it’s more difficult to spot and address. If you notice a persistent musty odor or visible mold growth, it’s time to act before the problem worsens.
Our 4-Step Water Damage Action Checklist
1. Locate and Stop the Water Source
For example, if a plumbing issue is the cause, quickly shut off the water supply at the main valve. This action will help minimize further damage to your home.
If you can’t stop the water supply, minimize the places water can enter your home. Divert water away from sensitive areas, especially electrical outlets and appliances. If you can’t safely reach the breaker box, use a dry, non-conductive object (like a wooden broom handle) to turn off the power. If needed, consider using a tarp or sandbags to redirect the water. The sooner the water source is contained, the less extensive the damage will be.
2. Move Belongings to Safety
With the water source controlled, your next step is to protect your possessions. Water damage can ruin personal items, especially electronics, documents, and furniture. Immediately move any items you can to higher ground or a dry location within your home. If it’s not feasible to move large furniture, place plastic sheeting or aluminum foil under them to keep them from absorbing moisture.
Be especially careful when moving electronic appliances. If you believe any of them may conduct electricity, use a non-conductive surface to move them whenever possible (such as rubber gloves).
3. Document the Damage for Insurance
This documentation will serve as evidence when filing your claim and ensure that you have a record of all damage, which is critical for claims. Take clear, well-lit photographs or videos of the affected areas and damaged belongings. Make sure to capture different angles of affected areas, along with close-up shot of items that are severely damaged.
Do not throw away anything until it’s been properly documented. Even items of medium value may be covered under your insurance policy. Detailed visual evidence helps speed up the claims process and ensures you get an accurate reimbursement for the damages.
Also, if there are any signs of mold or other secondary issues, document these as well, as they can often be worth compensation on their own.
4. Contact Professionals for Cleanup and Restoration
After taking immediate steps to mitigate damage, it’s time to bring in professionals. Water damage restoration can be a complex process that often requires specialized tools and knowledge. Professionals will not only assist in water extraction but will also focus on drying out your home, preventing mold growth, and identifying any hidden issues that could worsen over time.
While you may be able to manage some of the cleanup on your own, such as drying out minor water accumulation or removing excess water with towels, larger-scale efforts should be left to experts. They will have access to high-powered drying equipment and moisture detection tools that can identify hidden moisture in walls, floors, and ceilings. They’ll also be able to test for mold and other hazards that could pose health risks. Restoration experts are trained to prevent long-term issues by ensuring your home is fully dried and properly sanitized.
Additionally, water damage can often lead to structural issues, such as weakened foundations or warped floors. A professional service will assess the structural integrity of your home and help address any issues that may compromise its safety. If the damage is extensive, working with a restoration company ensures that the job is done thoroughly and safely, leaving you with fewer concerns down the line.
Contact Bill’s Plumbing and Sewer online or call us at 847-673-3045 today and get your personalized estimate!
Signs You Need Your Fire Hydrant Replaced
Key Takeaways
- Physical damage or instability compromises hydrant safety and function.
- Leaks, corrosion, and valve problems reduce water flow and reliability.
- Operational difficulties and low water pressure indicate performance issues.
- Freeze damage and environmental wear accelerate hydrant deterioration.
- Outdated designs, poor markings, and excessive maintenance needs justify replacement.
Signs You Need Your Fire Hydrant Replaced
Fire hydrants are essential for fire safety, providing firefighters with immediate access to water in emergencies. Over time, they endure harsh conditions—from weather extremes to physical damage—that can impair their function. Knowing when a hydrant requires replacement is critical for maintaining safety and reliability. Below are five key indicators to help determine when it’s time for a new fire hydrant.
Physical Damage and Structural Instability
Visible physical damage is an immediate red flag. Cracks, dents, or broken parts caused by vehicle impacts, vandalism, or weather conditions compromise the hydrant’s integrity. Even minor damage can worsen, leading to leaks or failure during critical moments. Missing components, such as operating nuts or outlet caps, often indicate that a hydrant has been neglected or damaged beyond simple repair.
Structural instability is closely linked to physical damage but deserves special attention. A hydrant that wobbles or leans suggests a weakened foundation or corroded mounting bolts, both of which threaten its ability to function under pressure. Instability increases the risk of the hydrant tipping or breaking off when opened. In many cases, repairing these issues is either impractical or insufficient, making replacement the safest option.
Leaks, Corrosion, and Internal Valve Issues
Leaks are a common sign of hydrant deterioration. Even a slow drip signals that seals, gaskets, or internal valves are failing. Persistent leakage wastes water and lowers available pressure, reducing firefighting effectiveness. Sometimes, leaks emerge from corrosion—rust and mineral buildup that eat away at metal parts. Corrosion can occur both externally, where it damages the hydrant body and paint, and internally, where it can seize valves or cause blockages.
Internal valve failure is particularly problematic. The valve’s job is to open fully to allow water flow and close tightly to prevent leaks. If the valve cannot operate smoothly—due to corrosion, sediment buildup, or wear—the hydrant becomes unreliable. Signs include difficulty turning the valve, partial water flow, or continuous leakage. Repairing valves in older or heavily corroded hydrants is often costly and temporary, leading to the conclusion that full replacement is the best course.
Operational Difficulties and Performance Issues
A fire hydrant should operate smoothly and reliably. If opening or closing the hydrant requires excessive force, or if the hydrant sticks or grinds during use, it compromises firefighting response times. These symptoms often indicate worn or damaged internal components, accumulation of sediment, or corrosion in the operating mechanism.
Performance problems extend beyond operation mechanics to water delivery. Low water pressure or flow rate during testing reveals hydrants that cannot meet firefighting standards. This underperformance might be caused by internal blockages, valve issues, or problems in the connecting water mains. Repeated failures to maintain adequate pressure despite routine maintenance suggest that replacement is necessary to restore safety and compliance.
Freeze Damage and Environmental Wear
In colder regions, freeze damage is a common cause of hydrant failure. Hydrants designed as dry-barrel units include drains to prevent water from freezing inside, but these drains can become clogged or malfunction. When water freezes and expands inside the hydrant, it can crack the barrel, bonnet, or valve seat, leading to leaks or complete failure.
Environmental wear includes damage from exposure to sun, rain, snow, and ice that deteriorates paint and protective coatings. Fading, peeling paint not only reduces visibility but also accelerates corrosion. Constant freeze-thaw cycles exacerbate these issues, making older hydrants especially vulnerable. When freeze damage is evident or the hydrant’s protective layers are compromised, replacement is often the most effective solution.
Outdated Design, Markings, and Excessive Maintenance Needs
Older fire hydrants may not meet current standards for safety, operation, or compatibility. Outdated designs often lack modern valve technology, proper pressure ratings, or standardized connection sizes. This creates problems for firefighters who depend on quick, reliable hose hookups. Hydrants that do not comply with regulations or have obsolete fittings limit firefighting efficiency.
Connect with us


- March 2026
- February 2026
- January 2026
- November 2025
- July 2025
- June 2025
- April 2025
- March 2025
- January 2025
- February 2024
- December 2022
- November 2022
- October 2022
- September 2022
- July 2022
- June 2022
- May 2022
- April 2022
- March 2022
- February 2022
- January 2022
- December 2021
- November 2021
- October 2021
- September 2021
- August 2021
- July 2021
- June 2021
- May 2021
- April 2021
- March 2021
- February 2021
- January 2021
- December 2020
Archives
Fix Clogged Drains & Leaky Faucets With Our Residential & Commercial Plumbing Services In Northbrook, IL
Get A Free Estimate