Water Heater Replacement in Morton Grove, IL
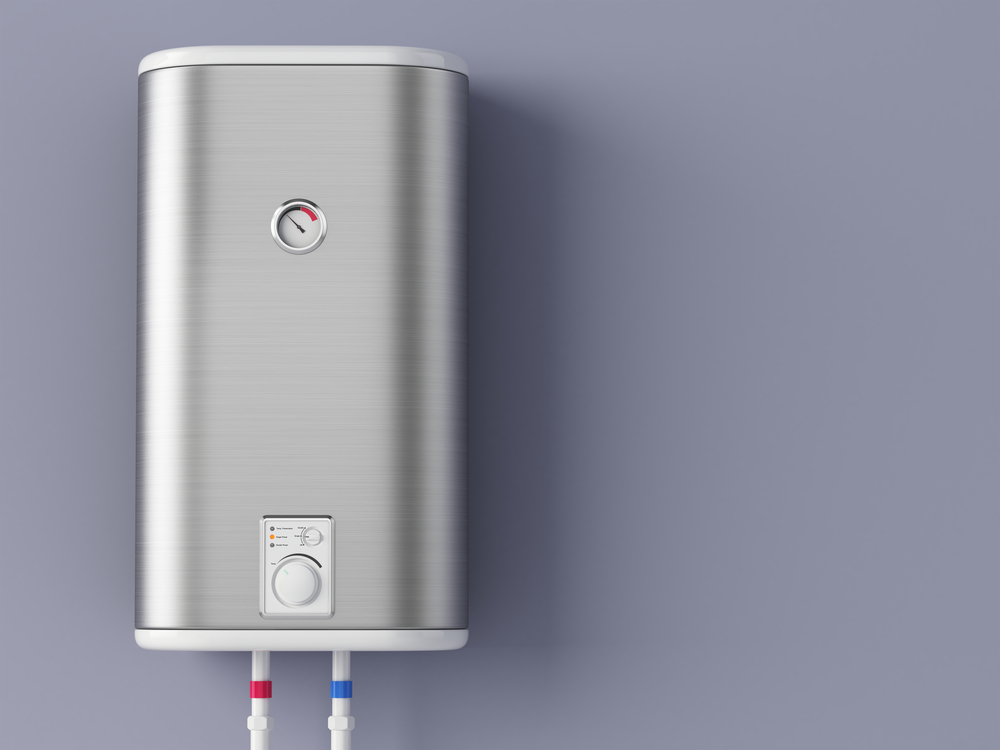
Your water heater plays an important role in your home by providing hot water for bathing, cooking, and other daily needs. You may not think of your water heater often, but if it stops working, it’ll certainly be at the forefront of your mind. In this guide, you’ll find out why Bill’s Plumbing & Sewer Inc. is the go-to source for water heater replacement in Morton Grove, IL.
How To Get Prompt Water Heater Replacement in Morton Grove, IL
At Bill’s Plumbing & Sewer, we care about your family’s comfort. Stepping into a shower and being hit with cold water is an awful feeling, so we understand the importance of fast water heater repair or replacement. When your water heater stops working, our plumbers will visit your home promptly and begin the installation process right away.
Our team of experts is well-versed in water heater replacement. Bringing years of experience into every home, our technicians can install either a standard tank unit or a more modern tankless system. We’ll work with you to decide which type of unit is best for your home and your family’s needs.
When To Seek New Water Heater Installation
If well-maintained, your water heater can supply your home with warm water for many years. On average, traditional tank heaters last about ten years and tankless heaters can last as long as two decades. If your water heater is significantly damaged or is nearing the end of its lifespan, having a new one installed is the best course of action.
Knowing when to get a new water heater isn’t always straightforward. Some issues can be addressed with a simple repair, while others require a complete replacement. The following are all signs that it’s time to seek water heater replacement:
Insufficient Warm Water
The tell-tale sign that your water heater is failing is inconsistent water temperature or a lack of warm water throughout your home. When your shower or sinks cannot reach a warm enough temperature, something is awry.
Leaking Around the Unit
If you notice water leaking from the water heater or accumulating around the bottom of the unit, there is something wrong with the pipes or valves. This can require a repair or, depending on the damage, total replacement.
Water Discoloration
The water in your home should always be clear. If you notice water discoloration in your sinks or showers, there may be rust buildup within your water heater.
Poor Water Pressure
When sediment builds up inside your water heater, it can impact the overall water pressure in your home’s sinks, tubs, and showers. If you notice poor water pressure, it’s time to schedule an appointment for an inspection.
Has your water heater stopped supplying warm water to your home? Contact the professionals at Bill’s Plumbing & Sewer Inc. today!
Trusted Residential Plumbing in Glenview, IL

One of the most bothersome things to deal with as a homeowner is plumbing trouble. Whether it’s a burst pipe or a clogged toilet, these concerns can really disrupt your daily habits. When you’re faced with any of these problems, you can look to Bill’s Plumbing & Sewer for residential plumbing in Glenview, IL.
Your Source for Top-Quality Residential Plumbing in Glenview, IL
People throughout Glenview turn to Bill’s Plumbing & Sewer for their household plumbing needs for many reasons. When you choose our team of plumbers, you can expect all of the following and more:
- Dedicated customer service
- Advanced plumbing expertise
- Prompt appointments
- Thorough attention to detail
- 24/7 emergency services
At Bill’s Plumbing & Service, we’re committed to the utmost in home plumbing care. When you choose our team of experts, you can rest assured your home is in good hands.
What Can You Expect From Bill’s Plumbing & Sewer?
At Bill’s Plumbing & Sewer, we offer a wide range of different plumbing services. From installing new water pipes to helping with home remodels, you can count on us for all of your plumbing needs. Below are just a few of our most popular plumbing services:
Clearing Clogged Sewer Lines
Having sewer troubles is an issue no homeowner wants to face. If your sewer line is damaged, it can lead to foul-smelling leakage, toilets that won’t flush, and sewage that backs up into your drains. When you notice any problems with your sewer, we’ll come inspect your property and address any sewer line concerns we find.
Replacing Lead Water Pipes
Does your home have outdated lead pipes? Lead pipes used to be the standard when it came to plumbing, but research shows lead in your water can lead to serious health concerns. Our technicians provide lead water pipe replacement to help you have safer drinking water for your family.
Installing New Kitchen and Bathroom Plumbing
Kitchen and bathroom remodels are big endeavors, and you shouldn’t tackle them alone. Let the professionals at Bill’s Plumbing & Sewer help with new sink installation, placing new showers, and installing toilets.
Flushing Out Drain Clogs
When too much hair goes down the shower drain or grease accumulates in the sink, clogs are bound to happen. Fortunately, our plumbers are highly skilled at drain cleaning, helping flush those clogs from your pipes and restore normal flow.
Don’t let these common plumbing problems go untreated! Clogged drains, sewer cracks, and more can all do serious damage to your property. Our team is here to help, so contact Bill’s Plumbing & Sewer for residential plumbing in Glenview, IL.
Residential Plumbing Solutions in Evanston, IL
No one wants a clogged sewer line, slow drains, or a burst pipe in their wall. These plumbing issues are unexpected burdens that hit all homeowners at one point or another. Continue reading to find out how Bill’s Plumbing & Sewer tackles these problems and supports residential plumbing in Evanston, IL.
Maintaining Your Residential Plumbing in Evanston, IL
Why do so many Evanston residents choose the plumbing services at Bill’s Plumbing & Sewer? Our commitment to client care and quality work is unmatched. We treat every home as if it were our own, ensuring all of your plumbing needs are met promptly and efficiently.
Our group of plumbers is highly experienced, providing expert service for a wide variety of issues. Clogged drains, broken pipes, and backed-up sewers can happen to anyone. When these issues impact your home, you can count on our plumbers to provide the best possible solution.
A Quick Look At Our Plumbing Services
At Bill’s Plumbing & Sewer, we offer various plumbing services. Whether we’re installing a new sink during your kitchen remodel or clearing out a clogged drain, you can count on us for all your plumbing needs.
Drain Cleaning
Is the water in your tub or sink slow to drain? Clogged drains are one of the most common household issues and certainly one of the most bothersome. Our plumbers can tackle your clogged drains in no time, helping clear your pipes and keep your water flowing.
Kitchen and Bathroom Remodeling
Many homeowners take on remodeling projects on their own, but certain aspects should be left to professionals. When remodeling your kitchen or bathroom, look to the technicians at Bill’s Plumbing & Sewer to repair or replace sinks, tubs, and toilets.
Lead Water Line Replacement
Having clean water that’s safe for cooking, cleaning, and drinking is critical. If your home has lead water lines, having them replaced with lead-free pipes can keep your family healthy. Our technicians are well-versed in lead water line replacement, and we’re happy to provide such a beneficial service!
Sewer Repair
When your toilet isn’t flushing or sewage comes back up in your tubs, something isn’t right with your sewer line. We’ll perform a thorough inspection, repair any cracks, and dislodge clogs to get things back on track.
If you’re looking to add new sinks to your bathroom or you’re having issues with your sewer line, Bill’s Plumbing & Sewer has you covered. Your home is our biggest priority and when you face a plumbing concern, we’ll go above and beyond to address it. Contact us online or give us a call to restore your residential plumbing in Evanston, IL!
Don’t let plumbing issues slow your home down! Having the best residential plumbing in Northbrook, IL makes a world of difference when it comes to slow drains and clogged sewer lines. Read on to find out why Bill’s Plumbing & Sewer is the leading team of plumbers in the Northbrook area.
Do You Need Residential Plumbing in Northbrook, IL?
If you’re looking for the highest quality plumbing services in the Northbrook region, consider your search over. Bill’s Plumbing & Sewer offers a complete range of plumbing services from a team of expert technicians. This includes the following and more:
Sink Installation
Are you planning a remodeling project for your kitchen or bathroom? The professionals at Bill’s Plumbing & Sewer can help install any new sinks, tubs, or toilets during your renovation process.
Water Pipe Replacement
Many homes are still equipped with lead pipes, which can leak lead particles into your drinking water. Keep your family safe by scheduling lead pipe replacement with our contractors. We’ll install brand-new pipes to keep your water clean and free of toxins like lead.
Sewer Line Repair
Most homeowners don’t know what’s going on with their sewer line until something goes wrong. When you notice your toilet is slow to flush or foul-smelling sewage backs up into your showers, you’ll know something is awry. Call the plumbers at Bill’s Plumbing & Sewer so we can assess your sewer system and provide the appropriate solution.
Pump Installation
Does your home need a new pump installation? Improper pump installation can create a major hazard, causing huge water leaks and property damage. Let the experts at Bill’s Plumbing & Sewer install your new pump to perfection so you can avoid these concerns.
Drain Cleaning
Almost every homeowner faces a clogged drain at some point. Some clogs are severe and completely block proper drainage, while others are more mild and simply slow drainage. However bad your clog is, our technicians can clear out the drain and restore proper flow of wastewater.
When To Call a Professional Plumbing Service
How do you know if your home needs professional plumbing care? Look for the following signs in your home:
- Slow drainage in sinks, tubs, and showers
- Toilets that don’t flush
- Sewage backup into tubs and sinks
- Outdated or faulty faucets, sinks, showers, and pipes
- Water leakage around washing machines, HVAC systems, pipes, and sinks
These issues often indicate some sort of plumbing issue within your home. While many homeowners enjoy DIY projects, trying to resolve a plumbing problem on your own can make the concern worse. Always consult with a professional for appropriate plumbing resolutions.
Do you need residential plumbing in Northbrook, IL? Call Bill’s Plumbing & Sewer for an appointment today!

Key takeaways:
- Lead pipes were once a widely used material for plumbing, but their toxicity led to their decline in popularity.
- Lead toxicity can cause various health problems, especially in children and pregnant women.
- If you think your house has lead water or you have been exposed to lead, visit a doctor immediately.
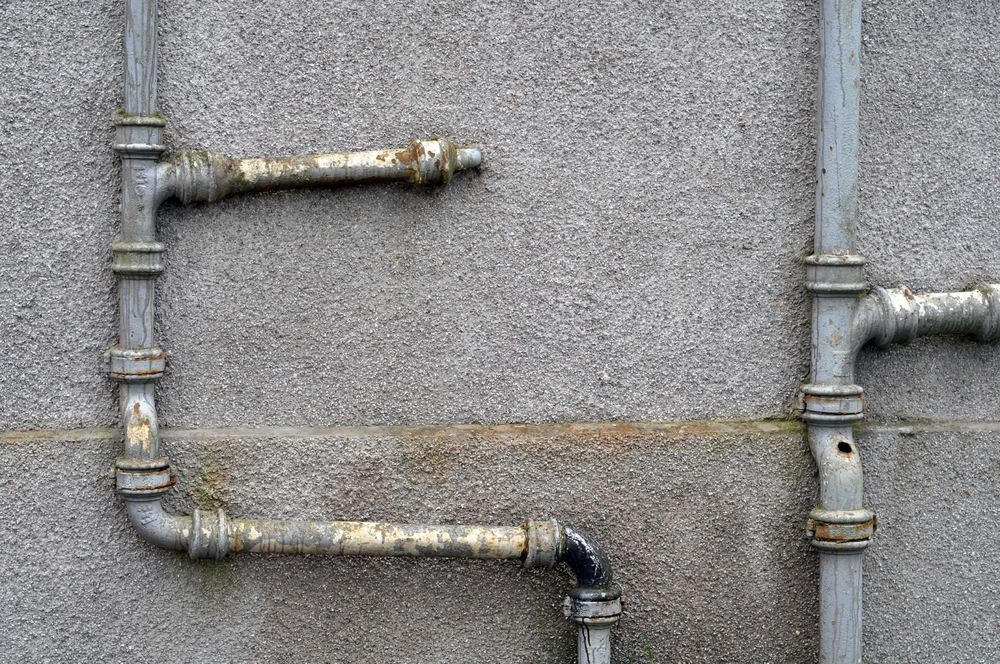
- You can check for lead pipes in your home by examining the outside water pipe coming into your house. If it is grey or does not magnetize, there is a chance it is made of lead.
- Hiring a professional plumber to replace lead pipes, such as Bill’s Plumbing & Sewer, is advisable.
Finding lead in your home may be frightening, especially because lead pipes are no longer used in homes. Understanding how to detect lead pipes hidden beneath your walls or ceiling is critical to safeguard your family’s health. If you’re concerned about the possibility of lead in your home, there are a few things you can do to check for its presence. One way to check for lead is to look at your home’s plumbing fixtures. If your home was built before 1986, there is a chance that it has lead pipes. Lead pipes are often dull gray and softer than other types of pipes, so that they can be easily scratched.
History Of Lead:
Lead has been used in the United States since colonial times. It was originally used for pipes and pottery. Lead is still used in many industries, including construction, batteries, and bullets. It is suitable for creating pipes in some ways since it is stable and easily bendable.
In the 1700s, lead was used to make white paint. This led to the widespread use of lead-based paints in homes and buildings. By the early 1900s, it was known that lead paint was poisonous. However, lead paint continued to be used in many homes and buildings until it was banned in 1978.
Use Of Lead Pipes in the USA:
The first plumbing system in the US was established in 1829 and quickly became a blueprint for commercial and residential facilities across the United States. Since lead pipes are stable, sturdy, and pliable, they have been utilized since the inception of plumbing. This form of pipe has become a favorite candidate for the construction of plumbing systems because of its adaptability and low cost.
However, In the late 1800s, it was discovered to be a source of lead poisoning. According to Richard Rabin, MSPH, an occupational and environmental health activist, by 1900, more than 70% of communities with 30,000 or more population were employing lead-based goods for water conveyance. Lead pipe are also easily bendable, allowing pipes to be molded to fit the shapes of existing buildings or other structures.
Lead poisoning was initially noticed in big cities such as New York and Boston, where indoor plumbing and lead service pipes — conduits for bringing water from the street main into a building — led to increased occurrences. Although the first health concerns were raised in 1859, there was no organized campaign to restrict or regulate lead plumbing until the 1920s.
Health Consequences of Lead:
It is a toxic metal that can enter your body through drinking water, breathing, or skin contact. When lead enters the body, it causes damage to your nervous system, brain, kidneys, and reproductive system.
Lead poisoning has varying effects on different age groups. Lead exposure in children can severely affect their nervous system development, resulting in reduced IQ, learning impairments, delayed growth, anemia, behavioral disorders, and hearing impairment. Adults exposed to lead water pipes may develop high blood pressure or hypertension, renal failure, and reproductive problems. Lead toxicity in pregnant women may disrupt fetal development and result in premature growth.
Symptoms of lead poisoning include stomach pain, vomiting, diarrhea, constipation, anemia, weight loss, irritability, memory loss, muscle weakness, paralysis, and convulsions. If you believe you have been contaminated by lead, you should visit a doctor immediately so that you may be treated. A safe amount of lead exposure does not exist. Even modest amounts of lead exposure can be harmful to one’s health.
Lead Use Regulations:
In 1992, the United States Environmental Protection Agency adopted a lead treatment technology rule to address issues connected with lead contamination caused by corrosive water. The Lead and Copper Rule, which requires frequent water monitoring and the replacement of lead service lines, must be followed by water utilities. These regulations were last updated in 2007. State governments may have tighter drinking water regulations than the EPA. The guidelines are only applicable to public water systems.
How To Check That Your Home Has Lead Pipes?
Even though the 1986 Safe Water Drinking Act outlawed the use of lead in new plumbing materials, lead may still be discovered in pipes and water. If your home was constructed before 1986, lead pipes might be hidden under your walls or flooring. You should examine your house’s pipes for lead unless you know they were renovated after 1986.
If the water pipe going into your home from the outside is grey, a magnet won’t cling to it, or when you scrape the pipe with a coin, it leaves a glossy silvery imprint; you may have a lead service line. If you have lead service pipes, your local water provider may have records or be able to do an in-home examination.
The only way to safeguard your health is to replace these lead pipes with new copper ones.
How To Replace Your Lead Pipes?
You can replace your lead pipes yourself or hire a professional plumber to do it for you. Most plumbers will charge by the hour for this service. The cost will vary depending on how many pipes need to be replaced and how difficult it is to access them. You may also need to pay for a permit from your local government before you can begin work on your plumbing system.
Call Bill’s Plumbing & Sewer if you need to hire a plumber to examine your sewage and water lines. We replace your water service lines entirely, so you have a continuous supply of lead-free water. We will repair deteriorating pipes behind your walls with Type-K copper pipes. We provide water pipe and plumbing repair services to Morton Grove residents. We also offer maintenance for inefficient sump pumps and water heaters.
Key Takeaways:
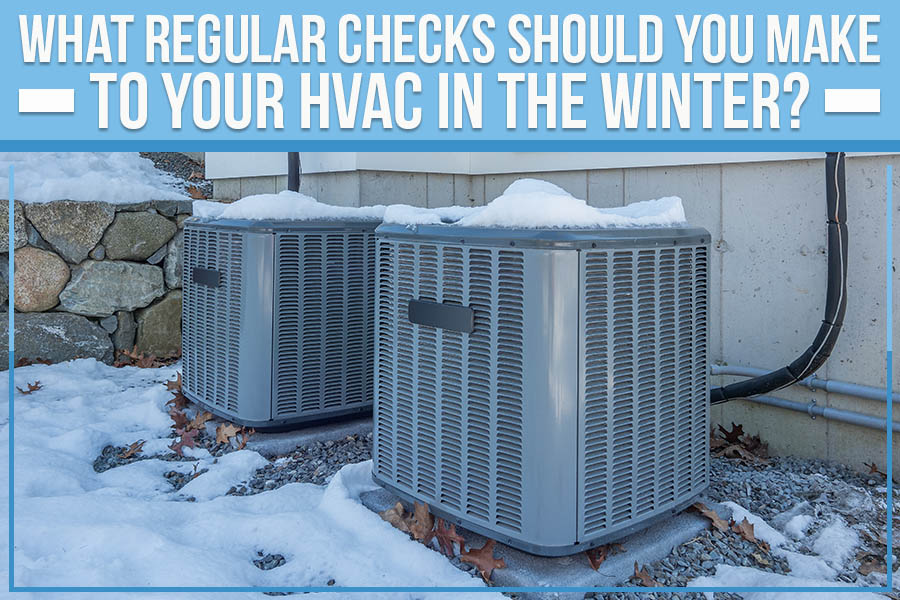
- Check your thermostat settings to make sure they are optimized for winter weather.
- Inspect and clean your HVAC unit’s exterior to remove debris or obstructions.
- Make sure your circuit breaker is functioning correctly.
- Clean your vents to improve airflow and efficiency.
- By regularly checking and maintaining these aspects of your HVAC system, you can ensure that it will continue running effectively during the colder months.
- Don’t forget to schedule a professional maintenance checklist as well!
- Bill’s Plumbing & Sewer offers plumbing and HVAC services to customers in Evanston, IL, and the surrounding areas.
It’s winter, and you’re probably not thinking about your HVAC unit, but you should! Even though your air conditioner isn’t running right now, it’s essential to maintain it regularly to run smoothly when summer rolls around. Bill’s Plumbing & Sewer will discuss what you need to do to keep your HVAC running smoothly in the winter. Keep reading for more tips!
Why Should You Run Your Air Conditioner in winter?
1. Save You Money
If you live in a climate where it gets cold in the winter, running your air conditioner can save you money on your heating bill. The air conditioner will help keep your home warm by circulating the air and keeping the temperature consistent.
2. Improve Your Indoor Air Quality
Another benefit of running your HVAC in winter is that it can improve your indoor air quality. The air conditioner will filter out any dust, pollen, or other allergens in your home.
3. Prevent Condensation and Mold Growth
It can help prevent condensation and mold growth. The air conditioner will circulate the air and keep the humidity level low, preventing condensation from forming on surfaces in your home.
4. Make Your Home More Comfortable
Running your HVAC in winter can make your home more comfortable. The air conditioner will circulate the air and keep the temperature consistent, making it feel warmer than if you didn’t have an air conditioner running.
5. Reduce Static Electricity
Running your air conditioner in winter can reduce static electricity. The air conditioner will circulate the air and keep the humidity level low, reducing static electricity build-up in your home.
6. Prolong the Life of Your Furnace
Running your HVAC in winter can prolong the life of your furnace. The furnace won’t have to work as hard to maintain a consistent temperature in your home if you have an air conditioner running.
7. Reduce Noise Pollution
It can reduce noise pollution. The air conditioner will circulate the sound waves and dampen them, reducing noise pollution in your home.
8. Security for Seniors and Young Children
Running your HVAC in winter can provide security for seniors and young children vulnerable to hypothermia. The air conditioner will circulate the warm air and keep their body temperatures consistent, preventing them from becoming too cold.
Also, read our blog on what to expect during residential HVAC maintenance.
A Winter HVAC Checklist: Things You Need to Do to Keep Your HVAC Running Smoothly
1. Check the Air Filter
The most important thing you can do to keep your HVAC running smoothly inwinter is to check the air filter. The air filter is responsible for trapping dirt, dust, and other airborne particles. If it becomes clogged, it can reduce the efficiency of your HVAC unit. Remove it from the HVAC unit to check your air filter and hold it to light. If you can see the light passing through the filter, it is still clean and does not need to be replaced. However, if the filter is dark or covered in debris, it should be replaced with a new one.
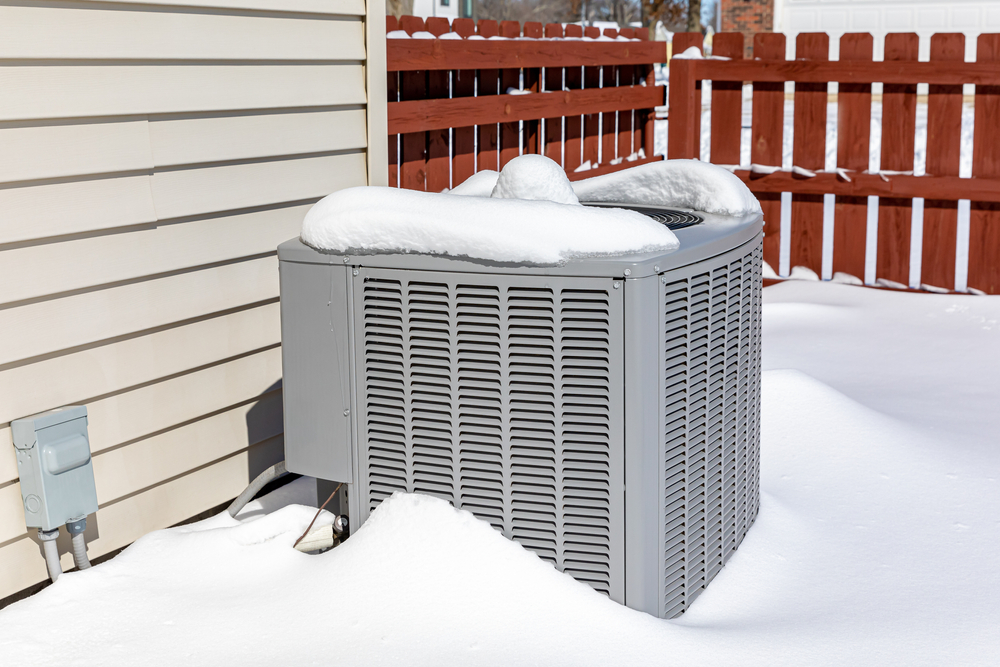
2. Inspect Your HVAC Unit
Another important thing you need to do is inspect your HVAC unit for any signs of damage or wear. Look for cracks or holes in the unit and any loose wires. Additionally, ensure that all the components are securely fastened and that there is no build-up of dirt or dust on any of the parts. If you notice any damage or wear, it is best to contact a professional HVAC repair technician for further assistance.
3. Clean Your HVAC Unit
In addition to inspecting your HVAC unit for damage, you must clean it regularly. Dirt and dust can build up on the coils and other unit components, reducing their efficiency. To clean your HVAC unit, turn it off and remove any dirt or debris accumulated on the coils and other parts. You can use a soft brush or cloth to gently remove any build-up without damaging the unit.
4. Replace the Thermostat Batteries
If your HVAC unit is not working correctly, one of the first things you should check is the batteries in your thermostat. The thermostat controls the temperature in your home, and if the batteries are dead, it will not be able to regulate the temperature properly. To replace the batteries in your thermostat, remove the old ones and insert new ones in their place.
5. Check the Circuit Breaker
Another potential cause of an HVAC unit not working correctly is a tripped circuit breaker. The circuit breaker controls the flow of electricity to your HVAC unit, and if it trips, it will cut off power to the unit. To check your circuit breaker, locate it in your home’s fuse box and reset it if necessary.
6. Clean the Vents
Another important thing you need to do to keep your HVAC running smoothly is to clean your vents. Vents can become clogged with dirt, dust, and other debris over time, restricting airflow and reducing the efficiency of your HVAC unit. To clean your ducts, remove them from their respective rooms and vacuum out any debris that has accumulated inside them.
Click here to learn more about maintaining your air conditioner.
Need HVAC Services in Evanston, IL?
If you’re looking for HVAC repair or maintenance services, we recommend calling Bill’s Plumbing & Sewer. We have years of experience providing top-notch plumbing and HVAC services to homeowners and businesses in the Evanston area. We’re confident that we can provide you with the quality care you need to keep your home or office comfortable all year round. Plus, our team is always up for a challenge; if something unexpected needs to be done, we’ll take on the project without batting an eyelash. So what are you waiting for? Get your project estimate today!

Key Takeaways:
- Drains are not garbage disposals and should not be treated as such.
- Coffee grounds, cooking oil, food scraps, grease, hair, eggshells, cotton balls and paper towels, flushable kitty litter, fats oils, sauces, and dairy products can all cause clogs in drains.
- To unclog a drain, you can use a plunger (for minor clogs), a drain snake (for more severe clogs), or a chemical drain cleaner (as a last resort).
- To keep your drains clean and prevent clogging, you should avoid putting certain things down, regularly flush your drains with hot water, and invest in a good quality drain cleaner.
Your drains are not garbage disposals. You may think they can handle the same things, but that is not the case. Your drains are much more fragile than you realize, and putting the wrong things down can cause serious problems.
If you want to avoid a backup and costly repairs, here are some things you should never put down your drains:
1. Coffee Grounds
They may seem harmless, but coffee grounds can clog up your drains and cause problems further down the line. Once they’ve gotten into the drain, they can be difficult to remove, so it’s best to avoid putting them down there in the first place.
2. Cooking Oil
Like coffee grounds, cooking oil can also clog up your drains. In addition, it can solidify and create a blockage that will be even harder to remove. If you want to dispose of cooking oil, it’s best to put it in a dumpster in a container.
3. Food Scraps
It may be tempting to rinse food scraps down the drain, but this can lead to some nasty clogs. Food scraps can attract pests and start to rot, neither of which are things you want in your drains. It’s best to either compost food scraps or disposes of them in the garbage.
4. Grease
Grease is commonly poured down the drains, but it’s detrimental. Grease can solidify and cling to your pipes, causing significant blockages. If you must dispose of grease, do so in a dumpster.
Related: Here’s Why You Should Never Pour Cooking Grease Down the Drain
5. Hair
Hair is another common culprit for clogged drains. It can be tough to keep track of all the hair that goes down the drain, but it’s essential to try. Keep a drain cover in place to catch stray hairs and dispose of them properly.
6. Eggshells
Eggshells may seem harmless, but they can do a lot of damage to your pipes. The sharp edges of the shells can scrape and damage the pipe walls, leading to leaks. If you must dispose of eggshells, make sure to do so in a way that won’t cause any damage.
7. Cotton Balls and Paper Towels
Cotton balls and paper towels may seem harmless, but they do more harm than good. These materials absorb water and then expand, blocking your pipes.
8. Flushable Kitty Litter
Contrary to popular belief, flushable kitty litter is not safe for your pipes. The clay in the litter can absorb water and expand, which can block your pipes. If you must dispose of kitty litter, do so in a garbage bag instead.
9. Fats, Oils, and Sauces
Fats, oils, and sauces are another common cause of clogged drains. They can solidify & cling to the sides of pipes, which can restrict water flow and lead to clogs. To avoid this, dispose of these materials in a separate container that can be appropriately disposed of.
10. Dairy Products
Dairy products can also cause clogs due to their high-fat content. The best way to avoid this is to dispose of dairy products in a separate container.
You’ll be doing yourself (and your plumbing) a big favor by keeping these things out of your drains. So next time you’re tempted to rinse something down the drain, think twice and ask yourself if it belongs there.

Different Methods Used to Unclog a Drain
Clogged drains can be a real pain to deal with. A few different ways to unclog a drain can be used, depending on the severity of the blockage.
- For minor clogs, a plunger can often do the trick. Place the plunger over the drain & push and pull the handle up and down. This creates suction that can help to break up the clog.
- You can try a drain snake if the plunger doesn’t do the trick. This long, flexible tool helps break up the clog.
- You can also try a chemical drain cleaner for very stubborn clogs. These cleaners contain harsh chemicals that can eat through the blockage. However, this should be your last resort, as they can damage your pipes if used too frequently.
Related: Homemade Drain Cleaners That Are Safe & Effective
Maintenance Tips to Keep Your Drains Clean and Clog-Free
One of the most important aspects of home maintenance is keeping your drains clean and clog-free. While it’s impossible to prevent all clogs completely, there are a few things you can do to minimize the risk.
- First things first, be careful what you put down your drains. Avoid pouring grease or oil down the drain, as these can harden and block the pipes.
- Second, regularly flush your drains with hot water. This will help to loosen any buildup and keep the pipes clear.
- Finally, invest in a good drain cleaner. Periodically running a cleaner through your drains will help to remove any buildup and keep your pipes flowing freely.
Conclusion
In conclusion, it is essential to be careful what you put down your drains and to flush them regularly with hot water. Using a good drain cleaner periodically can also help keep your pipes flowing freely.
Do you have a clogged drain? Bill’s Plumbing & Sewer is the company in Skokie to call when you have a clogged drain. We are experts at cleaning drains and can have them cleared in no time.
We understand that clogged drains can be a significant inconvenience. That’s why we work quickly and efficiently to clear your drains and get you back to your life.
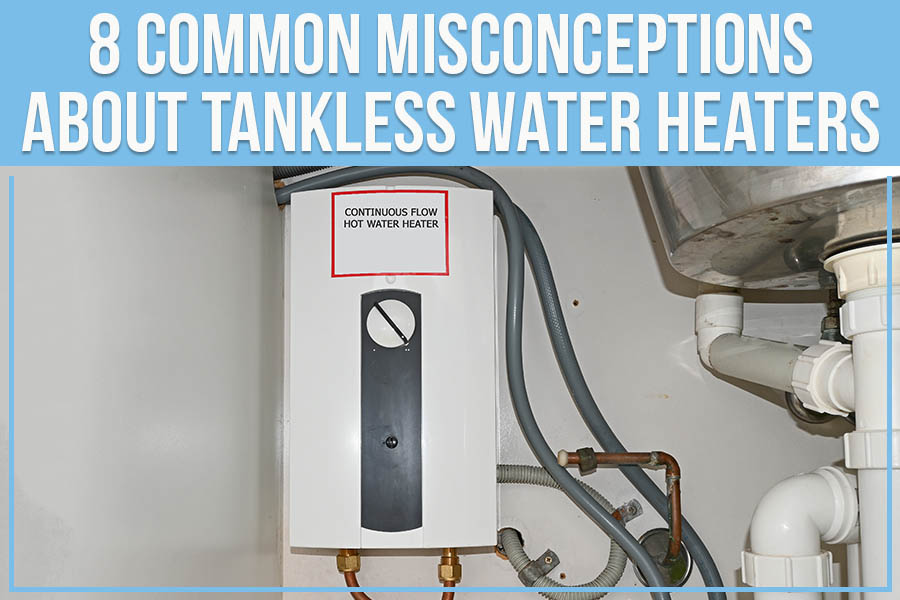
8 Common Misconceptions About Tankless Water Heaters
Key Takeaways:
- Installing a tankless water heater is among the most energy-efficient decisions you can make for your home this year.
- Tankless heaters are fast, offer precise temp control, require minimal water heater maintenance & are easy to house in constricted spaces.
- They, however, require specialized labor for installation purposes. One can’t DIY their way through storage to tankless retrofit since the housing, connections, & power requirements vary.
- If you want to boost the value of your estate, you can always opt for a tankless heater installation for higher ROI.
- There are a lot of discouraging & misleading water heater myths about tankless units, but they are borne of folks who have yet to discover the practical benefits of installing one.
- Bill’s Plumbing & Sewer carries the full range of Rheem heaters and will source A.O. Smith & Bradford White heaters upon request!
If you live in a house or operate a small business, chances are you’ve considered installing a tankless water heater. It is convenient during the winter when you need a hot shower in the morning before hitting the office commute. However, there are still some misconceptions about them.
Today’s blog post by Bill’s Plumbing & Sewer, serving Deerfield, FL, will dispel some of the most common tankless water heater myths. After reading this post, you’ll know everything you need to make an informed decision about whether or not installing a tankless water heater is right for you.
Myth 1: You Can Swap Storage & Tankless Modes With Ease.
Wrong!
The venting layout, electrical requirements & gas needs of storage in a tankless water heater differ. You can’t retrofit or swap between the two unless you have a thorough rework at the hands of a professional. It is best to have your water heater replacement done by someone who understands the layout difference.
Myth 2: Anyone Can DIY Install a Tankless Water Heater
If you are a trained electrician or a plumbing technician, you might be able to do so. Installing a tankless water heater requires skills to sell the right connections to the electrical outlets, make the right gas connections, and adhere to tenancy and area codes. Even if you go DIY, you could make a few mistakes affecting the tankless unit.
DIY is better managed with storage water heater units if you know what mistakes to avoid! Read here!

Myth 3: A Tankless Water Heater Delivers Instant Hot Water.
That is also a flawed perception. The tankless water heater heats water at a far slower rate than a storage one. If the unit stalled in the place of your previous heater, it will take a few seconds for the unit to heat up. Then the heater thermostat will determine how high a temperature it needs based on the flow rate set by the user.
Myth 4: All Tankless Water Heaters Come with The Same Functions
There are various models of tankless heaters. They also come with their ratings for efficiency, cost-effectiveness & ease-of-installation. So, you can choose a heater that best suits your budget or serves you the desired features. The more high-end a tankless water heater will be, the more features & auto-mated functions it can offer.
Myth 5: You Don’t Need a Permit To Install A Tankless Water Heater
All items in the category of intensive home appliances in Illinois require a licensed installer. Since a tankless water heater is a category III appliance, it will require specialized installation and connecting materials. Therefore, you might also need to secure a tankless water heater replacement permit.
Now for a few more slightly ridiculous myths on tankless heaters.
Myth 6: They Have High Operating Costs
Other myths about tankless heaters tend to be expensive and rack up quite a bill by the end of the month. Contrary to that belief, these water heaters offer optimized energy usage, leading to curbed utility bills that don’t dent your bank balance. You might as well save up to 1/5th of your total energy bills.
Myth 7: These Heaters Lack Thermostat Control
The first myth addressed the myth of the slow rate of water heating in these heaters, but this one cites the lack of thermostatic control. These heaters may be small, but they pack in quite a punch regarding heating and temperature control. So, you will get the water heated to the temperatures you need at the right time.
Myth 8: Tankless Water Heaters Have a Limited Water Supply
That has to be the most ridiculous & discouraging myth for anyone seeking to enhance their energy use optimization & curb their bills. Tankless water heaters do not work with a storage unit. They heat the water directly from the water feed and can deliver it on demand. There is no reason this myth should rob you of an ideal opportunity to keep your mornings warm & your bills cool!
Why Should You Get a Tankless Water Heater?
If you have gone through these myths, you will realize that the utility of swapping for a tankless installation is manifold.
- You have an ‘on-demand’ supply of lukewarm, warm, hot water; you name it!
- Your gas bills are not subject to the ongoing heating costs that come with owning & operating a storage water heater.
- They are space efficient. A storage water heater needs at least a 12-square-foot area for installation. A tankless variant will take up less and can be mounted too!
- Tankless water heaters are not subject to the rampant caulking, sedimentation & corrosive issues in storage units.
- Unlike storage water heaters, going tankless protects your home from the possibility of flooding in case the heater develops a leak.
- Suppose you want to enhance the ROI of your estate on resale or bump up the tenancy rates. In that case, you can opt for a tankless water heater installation.
Let’s Go Tankless Water Heating with Bill!
At Bill’s Plumbing & Sewer, serving Deerfield, IL, you can come in anytime or call us for any plumbing-related emergency, query, installation & fix, and we’ll be there. Our professionals are adept at trivial-to-intensive plumbing tasks in the region. We also do water heater maintenance in addition to replacement & repair.
Call us if you need assistance with sourcing & installing a tankless water heater. We offer a full range of Rheem heaters, and we can also source A.O. Smith & Bradford White heaters upon request!
Don’t forget to secure a free estimate on our services today!
The Best Way To Install A Water Heater

Key Takeaways:
- Water heater installation is not as difficult as you may think. However, it is best to consider plumbing professionals to do the job for you to avoid any potential hazards.
- If you are doing a DIY, consider the size of the water heater, the type of water heater, the location, and the tools and materials you will need.
- Water heater installation is a seven-step process that requires some technical skills.
- For more details, you can contact Bill’s Plumbing & Sewer. We also offer free quotes on exceptional water heater installation services.
The fall is coming sooner than we imagined, and a water heater will become a must in a few weeks. If you’ve been maintaining your water heater from all the tank issues, then you are good to go for the season. However, if you’re on for a new water heater installation and think you can do it on your own, you need to think over a few things.
Installing a water heater might not seem difficult. But it’s pretty much a herculean task if you don’t know what you are doing!
This blog post by Bill’s Plumbing & Sewer will discuss the best way to install your water heater– whether you DIY or call plumbing professionals. We’ll go over the fundamental of water heater installation and some tips and tricks to make the process easier for you.
DIY or Plumbing Professionals:
Like most people, installing your water heater probably seems a bit daunting. After all, a lot can go wrong if you don’t know what you’re doing. Water heaters are expensive, and if you mess up the installation, you could end up causing serious damage to your home- not to mention voiding the warranty on your new water heater.
It is always great to leave the installation of water heaters to experts. However, we realize that there are situations when you are forced to install the water heater yourself due to unforeseen circumstances.
Things to consider:
Size of the water heater:
Your requirements and consumption patterns will determine the size or capacity of your water heater. For instance, if many family members use hot water at various times throughout the day, you will need a larger tank than if everyone uses hot water at the same times every day or week.

Location of the water heater:
This is important for two reasons. The first reason is that you must ensure the water heater is installed in an area where it can be easily accessible for maintenance and repairs. The second reason is that the location of the water heater will affect how well it works. For instance, if you live in a chilly or cold place, you will want to ensure the water heater is installed properly so that it won’t be exposed to cold air.
Type of water heater:
Water heaters come in two types: electric and gas. Although installing a gas water heater is more costly, they are often more efficient than electric water heaters. An electric water heater can be a better choice if you live in a place where natural gas is not accessible or if you don’t want to deal with the inconvenience of installing a gas connection.
Cost:
The size, style, and type of water heater you select, along with other factors, will influence the installation cost. It’s also vital to think about whether you want to install the water heater yourself or whether you want to pay someone to do it for you.
How to Install A Water Heater Like A Pro, Even If You’re Not One Yourself?
If you’re installing a water heater, follow these steps:
Step 01: Turn off the power to the circuit breaker: Use a circuit tester to ensure that the power is off. Mark the wire connections with tape before cutting the wires.
Step 02: Remove the water heater’s access panels: Unscrew and remove the upper and lower access panels.
Step 03: Disconnect the water lines: The vent pipe has to be unscrewed from the vent hood and moved to the side. After that, use a tube cutter or a wrench to cut the hot and cold water pipes. Move the outdated water heater aside. Prepare a bucket to collect any water that may leak.
Step 04: Disconnect the gas line: Unscrew the union nut that connects the gas line to the water heater. If you don’t have a union, cut the copper pipe with a tubing cutter. Remove any excess pipe from the water heater using a hacksaw.
Step 05: Install the new water heater: Position it and connect it to the water supply. If you’re using a gas water heater, connect the gas line.
Step 06: Turn on the water and gas: Open the shut-off valves and turn on the water at the cold water inlet. For a gas water heater, open the shut-off valve and turn on the power at the breaker box.
Step 07: Test for leaks: Test all connections for leaks. Once the water heater is filled, turn on the power and let the water heater run for about an hour to heat the water.
If you’re uncomfortable working with gas or water lines, you should leave the water heater installation to a plumbing professional.
Why Hire A Professional Installer?
Although water installation could appear to be a simple operation, several safety factors must be considered to guarantee a safe and effective installation. These consist of:
- ensuring that the gas line is built and sized appropriately
- ensuring that the venting system is fitted and vented properly
- the water heater is installed in compliance with local building regulations
- ensuring that every connection is reliable and secure
Without taking these safety precautions into account, installing a water heater might lead to significant harm or even death. If something went wrong during the installation that resulted in serious damage to your home or personal harm, the DIY installation would not be covered by insurance, and the guarantee would not cover repairs.
Therefore, we recommend leaving the installation of water heaters to qualified and insured specialists. They’ll not only guarantee a secure and effective installation, but they’ll also be able to provide you with insightful guidance on picking the best water heater for your house.
Ending Note:
Now that you know how to install a water heater, you can decide whether to DIY or leave it to the plumbing professionals. Just remember: when in doubt, hire a pro! Trying to save a few bucks by going the DIY route might not be worth it in the long run.
Call Bill’s Plumbing & Sewer, serving Wilmette, immediately if you require water heater installation. We are more than delighted to assist you in selecting and installing the ideal water heater for your residence from our team of qualified experts.

Which is more important for a home remodel: the kitchen or the bathroom? This question is one that many homeowners face when they decide to renovate their homes. Both spaces are important, of course, but which should be your top priority?
In this blog post, Bill’s Plumbing & Sewer will look at each space’s pros and cons and help you decide for yourself. So, which is it: kitchen or bathroom? Let’s find out!
The kitchen is usually known as the heart of the home. It’s where we gather to cook, eat, and socialize. Because of this, many homeowners choose to prioritize the kitchen in their remodeling project.
There are a few things to consider when deciding between a kitchen or bathroom remodel.
The Frequency of Usage:
First, how much do you use in your kitchen? If you love to cook and entertain, you’ll likely want to put more emphasis on this space. However, if you don’t spend much time in the kitchen, you may be able to get away with a less extensive remodel.
Visibility in the House:
Another thing to remember while pondering between a kitchen or bathroom remodel is how visible your kitchen is to the rest of the house. If it’s an open concept floor plan, your guests can see any updates you make. That may not be as important if your kitchen is more hidden away.
The Potential Return on Investment:
Finally, you’ll want to consider your home remodels potential return on investment (ROI). Kitchens tend to have a higher ROI than bathrooms, so if you’re looking to increase the value of your home, this is something to keep in mind.
Consider Your Budget:
Typically a kitchen will cost more than a bathroom remodel. So, this is something to consider if you’re working with a limited budget. However, at times bathroom remodels can be just as expensive as kitchen remodels, so it depends on the scope of your project.
Think About Your Needs:
Consider your precise needs and what you hope to achieve with your home remodel. If you entertain often, a new kitchen might be a good investment. A new bathroom might be the way to go if you want to create a more relaxing space.
Consider Aesthetics:
Another factor to consider is aesthetics. A kitchen can be a great way to update the look of your home, while bathroom remodels can provide you with a more luxurious space. It comes down to personal preference and what you think will add value to your home.
Think About The Future:
Finally, consider the future when deciding between a kitchen or bathroom remodel. A kitchen can be a great way to increase the value of your home. At the same time, a bathroom remodel is more likely to provide you with immediate enjoyment.
Remember that the kitchen and bathroom are important spaces in your home, no matter which room you decide to focus on first. With a little preparation, you can create a beautiful and functional space that you and your family will enjoy for years.
Contact us today if you’re considering remodeling your home in Evanston, IL. We can help you decide which room is the best investment for you and provide an estimate for the project.
Bill’s Plumbing & Sewer is the one-stop shop for all your plumbing needs. They can handle everything from home remodeling projects to commercial plumbing services. They even offer drain cleaning assistance if you need it!
Whether you focus entirely on your kitchen or bathroom, we guarantee you won’t be disappointed with the results!
Connect with us


- July 2026
- June 2026
- May 2026
- April 2026
- March 2026
- February 2026
- January 2026
- November 2025
- July 2025
- June 2025
- April 2025
- March 2025
- January 2025
- February 2024
- December 2022
- November 2022
- October 2022
- September 2022
- July 2022
- June 2022
- May 2022
- April 2022
- March 2022
- February 2022
- January 2022
- December 2021
- November 2021
- October 2021
- September 2021
- August 2021
- July 2021
- June 2021
- May 2021
- April 2021
- March 2021
- February 2021
- January 2021
- December 2020
Archives
Fix Clogged Drains & Leaky Faucets With Our Residential & Commercial Plumbing Services In Northbrook, IL
Get A Free Estimate